Contents
- Modernisation Budget Upload
Modernisation Budget Upload
 Updated
by Caroline Buckland
Updated
by Caroline Buckland
- Modernisation Budget Upload
Modernisation Budget Upload
Details of the change
We are pleased to announce the modernisation of Budget Upload.
Key Details
This update brings several benefits, including:
- No local installation or macro security prompts
- JavaScript add-ins run in a sandboxed web environment — not as macros inside the workbook — so users don’t need to lower their macro security settings or trust Visual Basic for Applications (VBA) projects.
- Passes IT security reviews more easily
The new add-ins use HTTPS and are centrally deployed or sideloaded, avoiding the risks of unsigned VBA code and macro viruses. - Works across platforms
Our add-in runs on Windows, Mac, Web (Excel Online), and even mobile, unlike VBA, which is Windows desktop Excel only. - Logon option is now Single Sign on (Advanced Identity)
Setup required
The following user role must be selected for each user in User Manager.
Access User Manager from MyWorkplace>Locate the User and user the Edit action.

Access the Groups tab and locate group Rest Service User.
Financials - Budget Upload
Budget Login
The Budget Download/Upload add-in will allow the download and subsequent upload of General Ledger Budget entries from an Excel workbook to an appropriately configured Financials system.
Installation
- Excel - Online Versions
- Setup Add-in for Excel - Online
To install the Budget Upload Add-in for either Excel for the Web or Excel Desktop:-
For Excel for the web
- Open https://excel.cloud.microsoft/
- Select New- Blank workbook
- From Excel, click on the 'Home' tab and select 'Add-ins' then ‘+ More Add-ins’:

For Desktop Excel
- Open Excel Desktop
- Select New – Blank workbook
- From Excel, click on the 'Home' tab and select 'Add-ins' then ‘+ More Add-ins’:

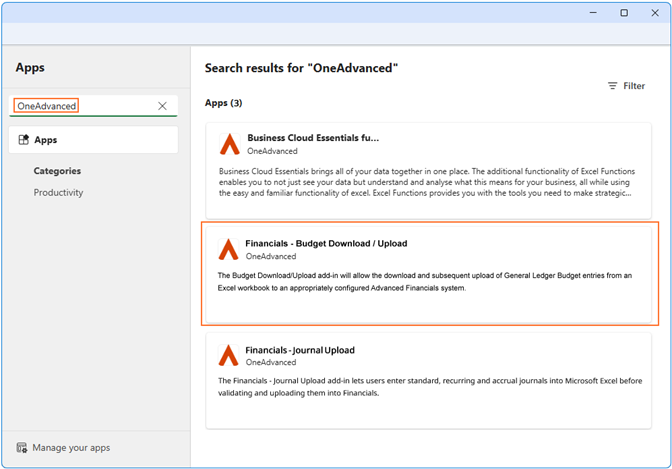
For both Web and Desktop, from the Office store, search for 'OneAdvanced' and the 'Financials – Budget Download/Upload' will show in the available list:
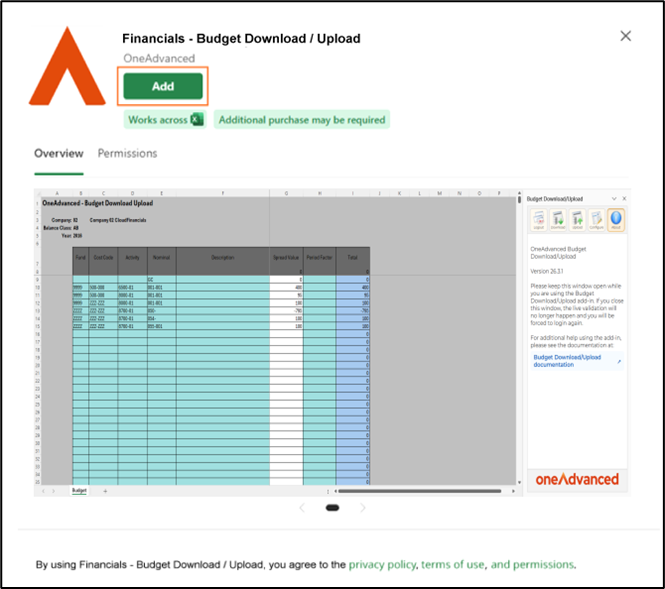
Click on the Add button and accept the licence terms by clicking on the 'Continue' button:
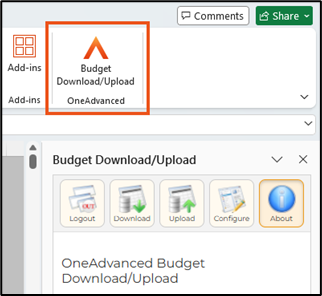
The Budget Upload button will be displayed on the menu ribbon, indicating the 'Add-in' has been successfully install
Configuration
Before using the Budget Download/Upload add-in you must configure the connection to the Financials system.
Click on the Configure button and the settings will appear in the task pane to the right of the spreadsheet.
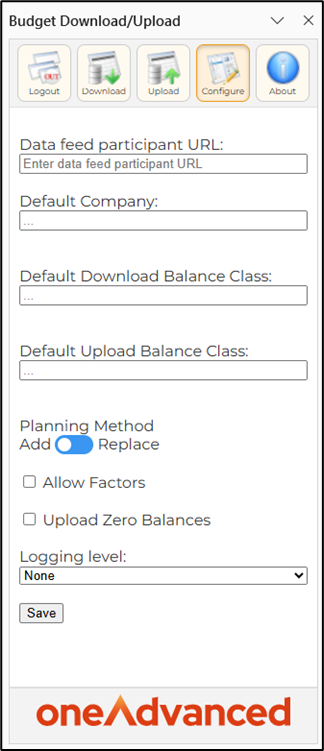
Enter the following details.
URL: The URL of the Financials system you wish to connect to, this can be found once you login to Financials. i.e. https://services1.cfpresales.jupiter-ecs.oneadvanced.io


Default Company
This is the company that will be initially displayed in the Download dialogue, it can still be changed during the download process.
Default Download Balance Class
You may enter a default download balance class, you can still change this during the download process. For example, you might use (AB) for your actual balances.
Default Upload Balance Class
You may enter a default upload balance class, you can still change this during the download process and again on the upload dialogue. For example, you may use BV Initial Budget balance class.
Default Planning Method
You may set the planning method (Add/Replace) that will default upon upload. This value can still be changed during the upload process.
Allow Factors
Set this on if you want the option to use factor spread values in the spreadsheet.
Upload Zero Balances
By setting this flag, the sheet must balance to zero before you can upload the data.
Logging Level
This will default to none. If you are having problems with the add-in the support team may ask you to switch this to Debug to give our team additional information.
Select the Save button once complete.
Login
Once configured you can now select the Login icon.
If you are not already logged in to MyWorkplace, the login screen will be displayed.
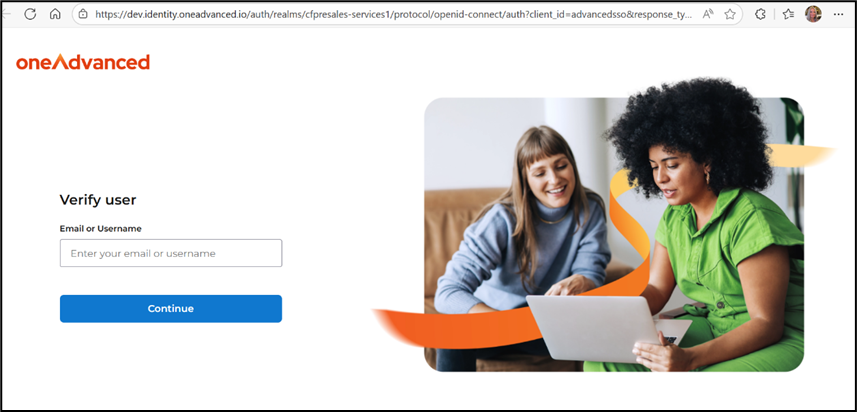
The following notification is displayed.

Budget Download Process
Overview
You can download codes first to configure your spreadsheet.
Select the Download button.
To use Budget Download, you need to have logged into Financials as described in the previous section.
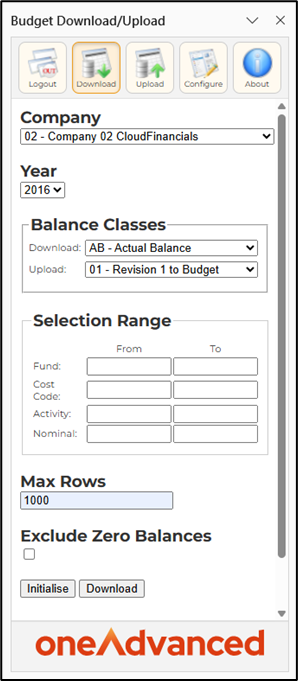
Field Descriptions
Company
Select the Company from which balances are to be extracted. The default company can be set in the configuration utility.
The Company selected will determine which Years and Balance Classes can be used.
Year
Select the Year for which balances are to be downloaded.
The Years displayed will be restricted to those for which balances are held within General Ledger.
The year will default to the current year for the selected company.
Balance Classes
Download
Specify the Balance Class for which balances are to be extracted.
The Balance Classes displayed will be those that exist for the Company specified. Secured balance classes can be excluded from the list by setting up the facility denials on program EHY (Planning Request Validation) for security groups that are attached to a user in Financials.
A default download balance class can be set in the configuration utility.
Upload
Select the Balance Class for which budget transactions are to be uploaded. The Balance Classes displayed are those which can be used, based on the path of the Download Balance Class.
If the Download Balance Class uses path 0, then upload may be to any Balance Class. If the Download Balance Class does not use path 0, then upload must be to a Balance Class whose path is the same as that used by the Download Balance Class.
A default download balance class can be set in the configuration utility.
The Balance Class chosen for upload may be changed when specifying the upload parameters, however the same rules will apply.
Selection Range (not used for Initialise)
Nominal and Cost Centre
These parameter ranges will restrict the balances that are extracted. The ranges that can be entered are determined by the path of the Download Balance Class.
Only those account code parts that are relevant to the download path are displayed.
Any or all of the Selection Ranges can be left blank to indicate that all values will be extracted.
The user can specify dummy values (e.g. from ZZZ to ZZZ) to extract no data, thus giving a blank sheet for manual entry of budgets.
Maximum Rows
Specify the total number of detail rows required in the worksheet, if left blank it will look to load 650000 rows.
Blank lines are permitted.
This field allows the user to ensure that the resultant worksheet contains enough blank rows to enable the manual entry of additional budgets.
Exclude Zero Balances
Checking this field will result in balances that total to zero will be removed from the download.
Factor
If you would like to enter a specific factor, then just enter a single Spread Value value which will automatically be split across the periods as per the factor settings in Financials.
This can be disabled from within the configuration utility.
Initialise
Following entry of the download parameters, clicking the Initialise button formats the blank sheet with the GL Account information ready for new data to be uploaded. The selection range is not required for this action.
Download
Select the Download button, this will trigger a process in Financials and this process will return the required information to populate the data on the worksheet based on the information entered on the download dialogue.
Budget Data Entry
The Budget worksheet displays a column for each period and a column for each part of the account key specified by the Upload Balance Class path. For example, if the upload path is 0, then columns are displayed for each part of the full account key.
The user can amend the period values as required for the Budget Upload. Additional budgets can be created by entering values in the blank rows below the downloaded budget data.
Validation at this stage is restricted to ensuring that the entered data is of the correct format, ensuring that numeric fields contain valid numeric values.
If factors are in use, then only a single ‘Spead Value’ column will be displayed together with a Period Factor which can be used to override the default factor selected during the download process.
To delete rows, you will need to unprotect the worksheet
Budget Upload Process
Overview
Before Budget Upload can be used, Budget Download must have been completed to either initialise the sheet or download data.
See Budget Download Process and Budget Data Entry for a description of how to download budget data and how to amend that data prior to uploading into Financials.
Upload Dialogue Screen Access
Select Upload from add-in buttons.
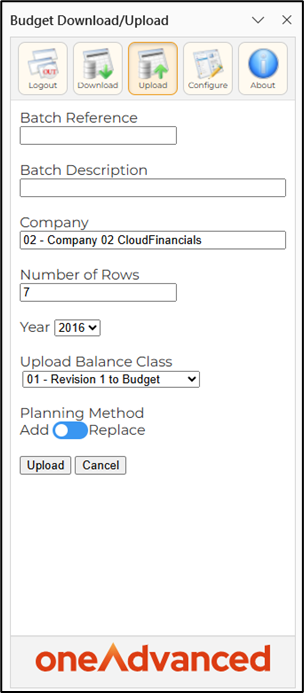
Field Descriptions
Batch Ref
Specify up to four characters for the General Ledger Batch Reference. This reference must be unique for the Company being used. This field will be protected if the controls against the batch type specify that the batch reference will be generated automatically.
Batch Description
Specify up to 40 characters for the General Ledger detail description if this is not entered, the description will be defaulted from the batch header description.
Company
The Company to be used for upload is displayed. This cannot be changed.
Num of Rows
The number of budget rows that are to be uploaded is displayed.
Year
Select the year in which budget transactions are to be created. The selection list is populated with the years for which budgets may be entered for the Company and will default to the current year.
Upload Balance Class
Choose the Balance Class for which budget transactions are to be uploaded. The list provided will be all appropriate Balance Classes based on their path and if available, the upload balance class selected during the download will be defaulted.
The transactions flag must be ticked on the balance class controls in Financials.
Factor
If you choose a factor during the download, this will be displayed here. You cannot change the factor at this point.
Planning Method
Indicate whether budgets are to be added to existing balances or whether they are to replace existing balances. If balances are to be replaced, then a single transaction will be created totalling the adjustment required to move from the old balance to the new balance entered.
Upload Process
Following entry of the upload parameters, selecting the Upload button submits process E44 to Financials.
The status bar will show the status of the process whilst it is running.
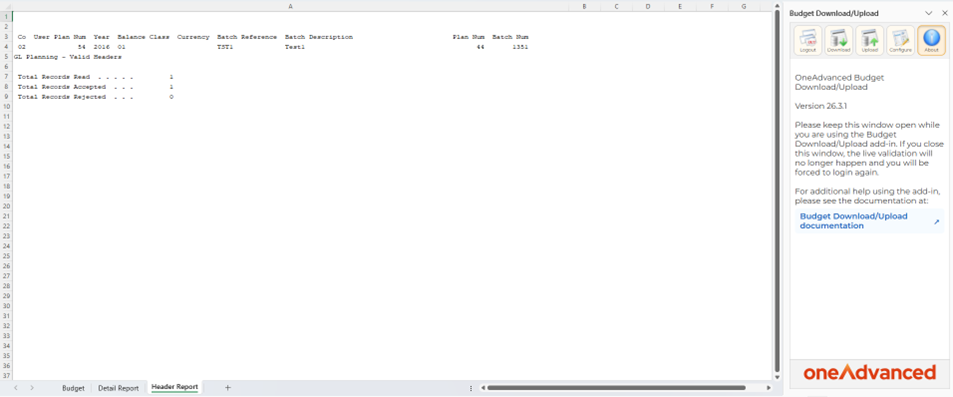
When the upload process has completed, the relevant valid and invalid reports generated within Financials will be downloaded to the Header Report and Detail Report worksheets within the Excel workbook. These reports inform the user whether the upload has been accepted into Financials and, if not, what validation errors occurred.