Contents
Stock Taking
 Updated
by Caroline Buckland
Updated
by Caroline Buckland
Create a Stock Take
Overview
The Stock Take process enables users to physically count stock and enter the quantities on to the system. The system then compares what is actually counted against currently that recorded. A user with appropriate Facility Denials will be allowed to adjust the stock based on the variances identified. Adjustments are made within Inventory Management and General Ledger.
Items held in stock will be counted on an ad-hoc basis. Various criteria can be used to list the item(s) required for counting.
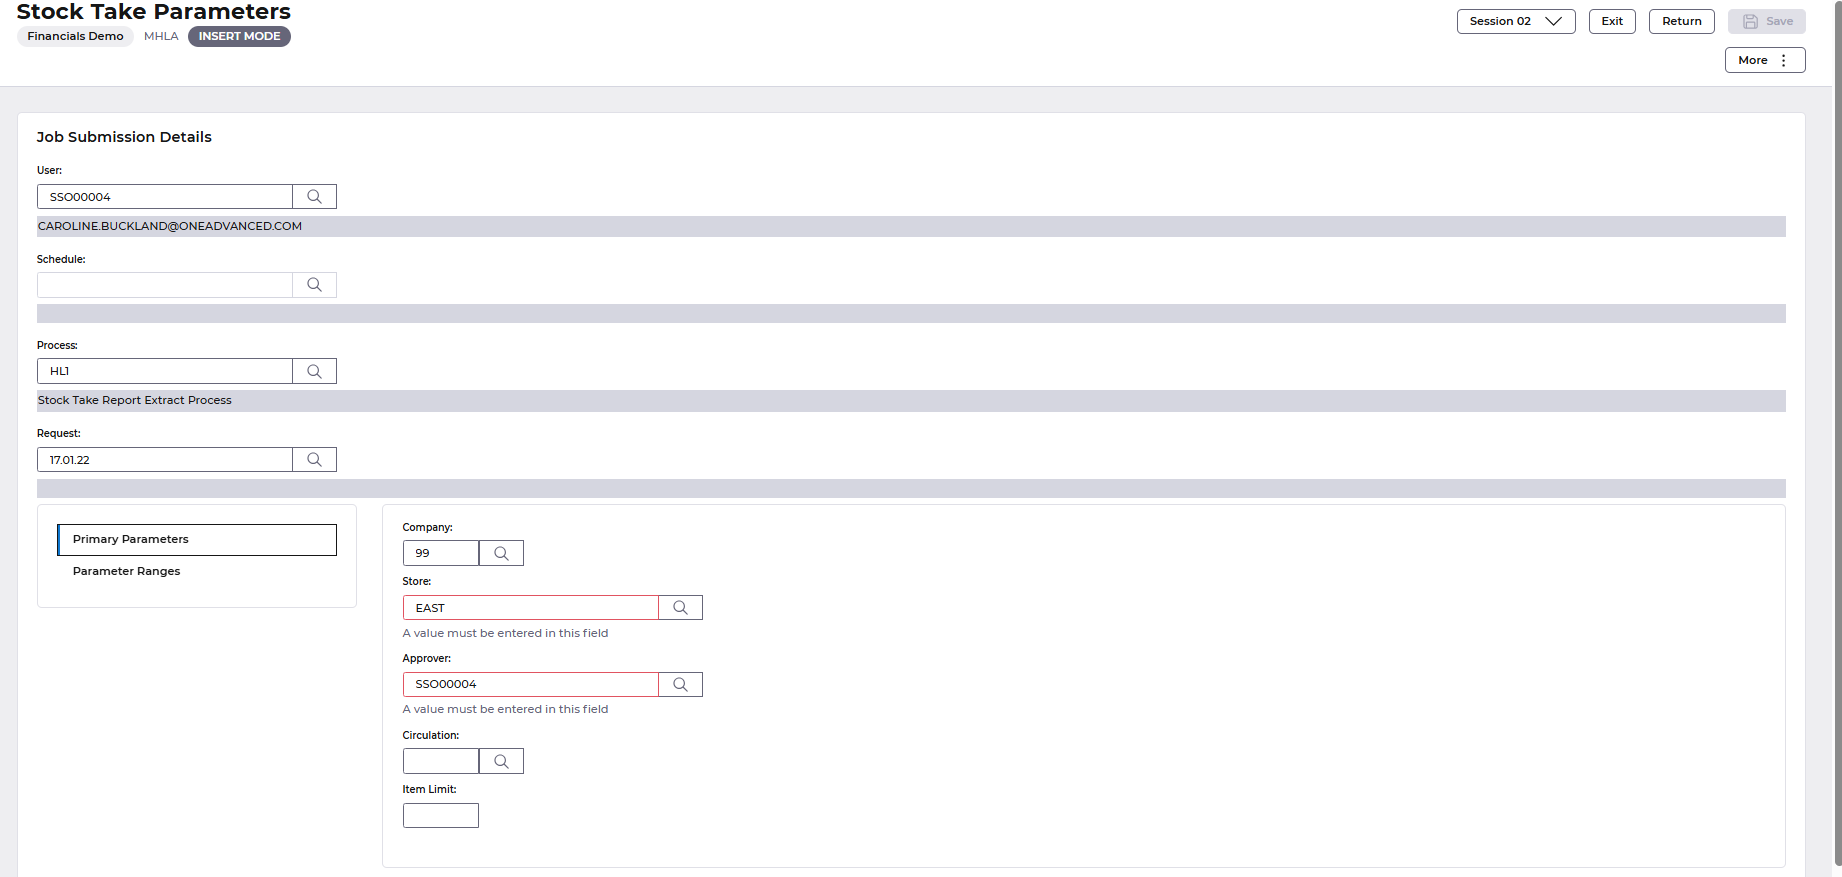
Company, Store and Approver are mandatory. The approver is the nominated person who approves any variances that may have been discovered while performing the stock take count.
In Financials from the Main Menu go to – Inventory Management – IM Processes – Stock Taking and select the Stock Take Process option
A parameter screen will be displayed.
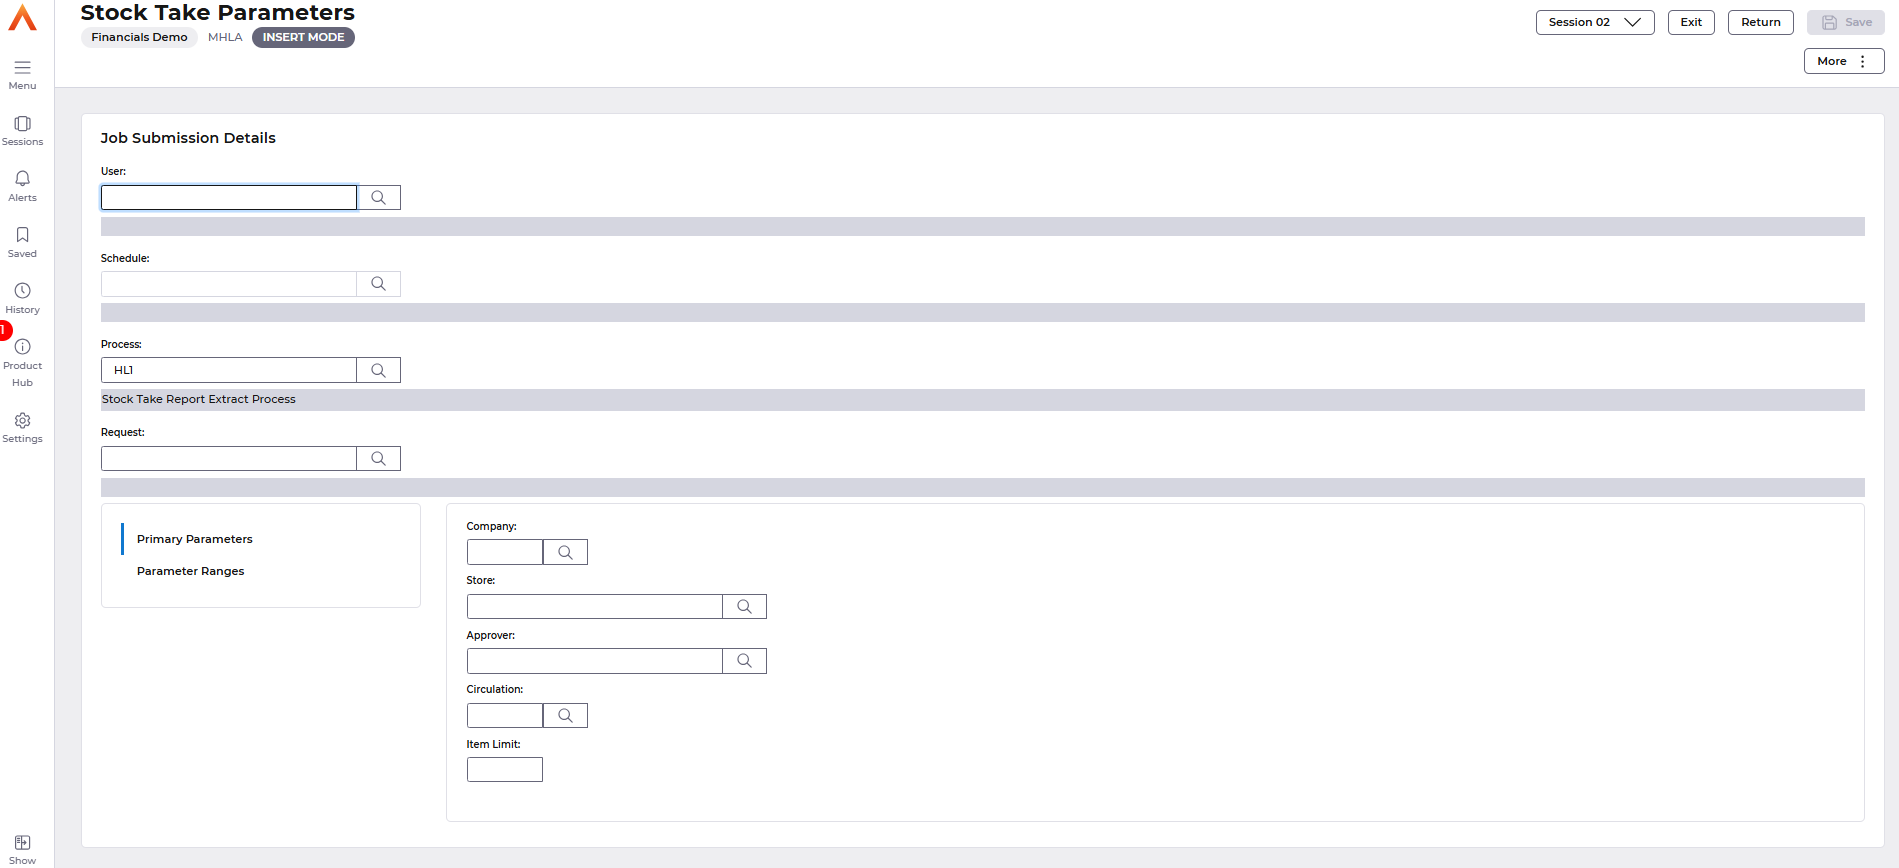
Scroll down the screen to view the selection parameters for the Stock Take.
The Primary Parameters available to select include
Company - this field is where the user stipulates which company the Stock Take Process is too ran for.
Store – this is the store that the user wishes to have the stock take performed in. You can select the Search icon to view all available Stores in the Financials company.
Approver - the approver is a nominated person who is to receive the BEM notification if the person who enters the counts has been denied the ability to update the Inventory system with the quantities counted. Where this is the case, following initial entry of the counts, the stock take status is set to Unapproved and an "approver" must then approve the counts that have been entered before any adjustments are generated for any lines where there is a variance between the quantity counted and that recorded on the system.
The nominated approver must not have the update Stock Counts facility denial set.
Circulation - the circulation code stipulates where the stock take print should be printed and who should receive a copy. The circulation code defaults from the store that the user enters but may be altered.
Item Limit - this is a numeric field indicating the maximum number of items to be counted in this stock take.
The field is optional.
When a limit is set, the items selected by other criteria are printed on separate stock take sheets limited by this number. So, for example, if 50 items were selected and a limit of 10 set, then 5 sheets will be printed with 10 items on each.
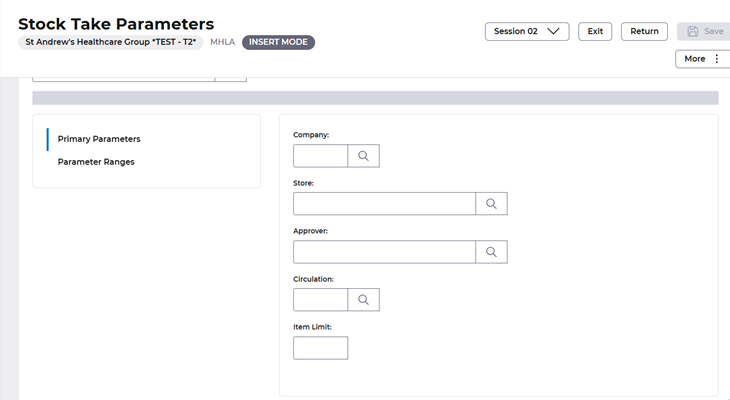
In some circumstances you may not want to perform a stock take for all items within the store, in that scenario you can move to the Parameter Ranges tab to further specify the stock take
Parameter Ranges
The Parameter Ranges screen displays the additional parameters that can be applied to the stock take. All these fields are optional.
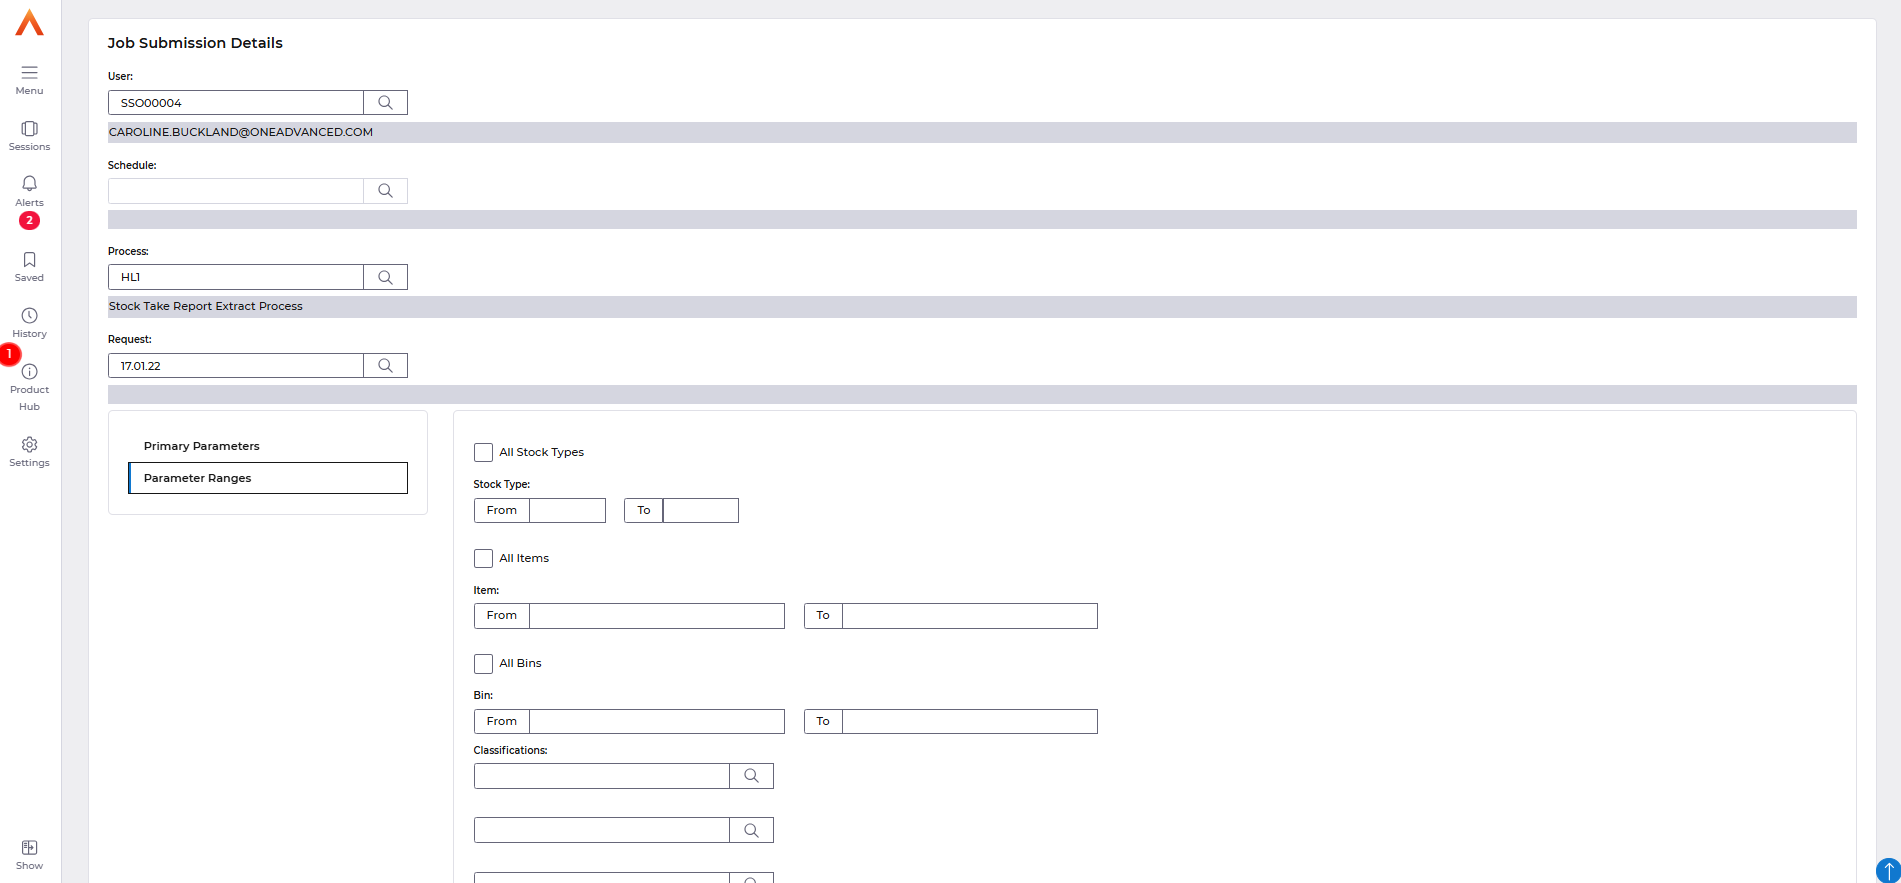
The Parameters Ranges available to select include
All Stock Types - if required the flag must be ticked - it cannot be entered along with stock type from and to fields.
Stock Type from and to – this is the "start" range of what stock types are required on the stock take count. These fields may not be entered if All Stock Types is ticked.
All Items - if required the flag must be ticked - it cannot be entered along with the item from and to fields.
Item From and To - this is the "start" range of what items are required on the stock take count.
These fields may not be entered if the All-Items parameter is ticked.
All Bins - if required the flag must be ticked – it cannot be entered along with bin from and to fields.
Bin From and To - this is the "start" and “end” range of which bins are required on the stock take count. These fields may not be entered if the All-Bins parameter is ticked.
Classifications 1 to 6 - you can enter up to 6 different classifications to stipulate which type
of items will be include in the stock take. This must be a valid Item Classification Code (MPXA).
ABC Classification - entry in this field allows the Stock Take to be further limited in the items that it selects. If the field contains all Underscores '___' (which is the initial default) then all items matching the other selection parameters will be extracted, regardless of Classification.
If the field is set as all spaces, then only Items which have no classification will be selected.
Other than the two situations above, combinations of the A,B and C classifications can be entered. This will retrieve only items matching these classifications e.g. A, AB, ABC, AC etc.
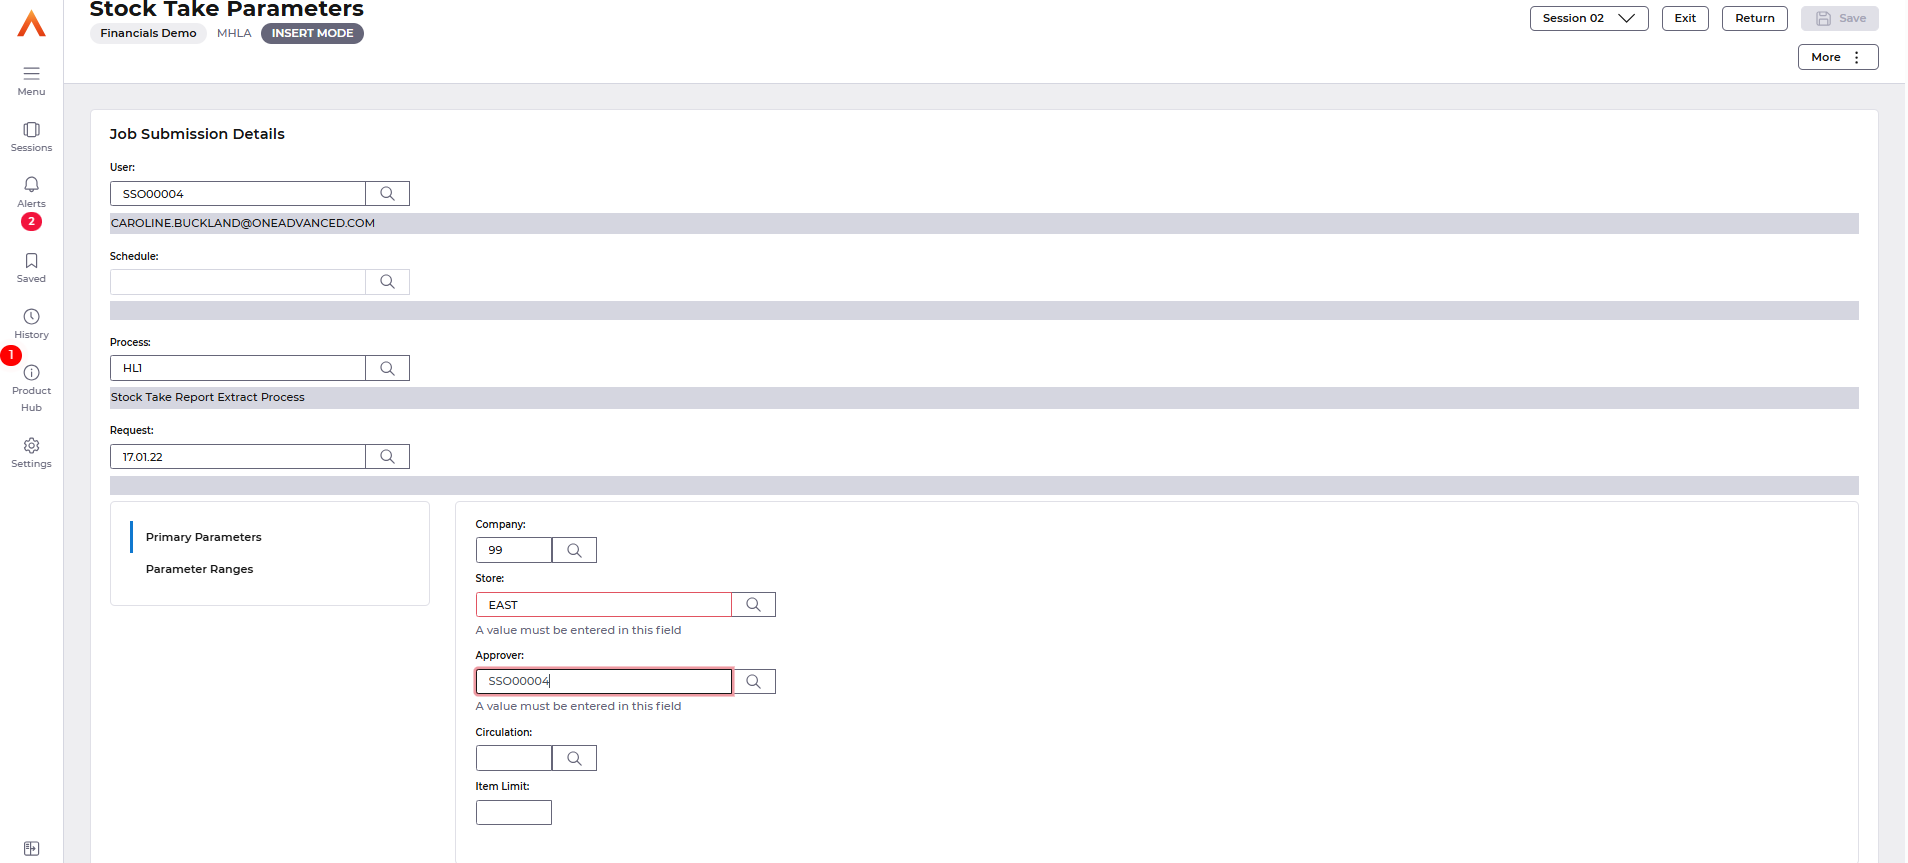
EXAMPLE
In this example a Stock Take is going to be performed for Store ‘East’ in Company ‘99’ with the Approver field populated with my User ID, no item limit has been specified, the Circulation Code will default in from the Store Controls setting. None of the fields on the Parameter Ranges screen have been populated.
This will perform a Stock Take for all Items within the Store, across all bin locations.
Then select the More: Queue – Submit action.

An About to Submit window will be displayed.
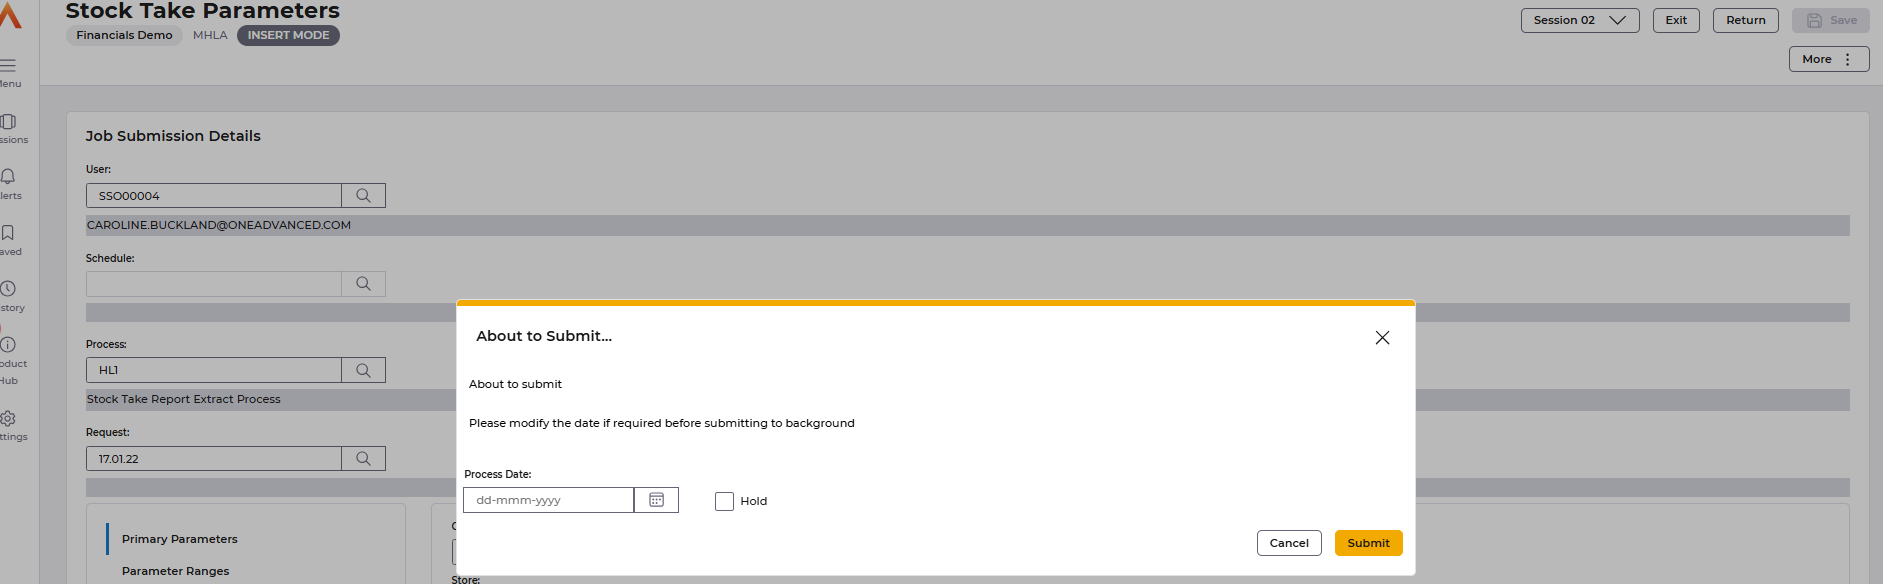
Select the Submit button, and you will receive confirmation that the request has been successfully submitted.

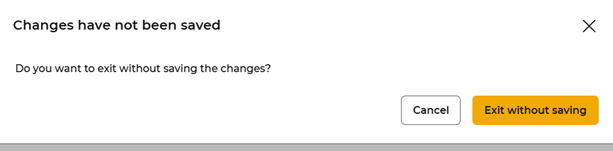
Select Exit and then select Exit without saving as you have now submitted the Stock take.
Stock Take Document
A Stock Take document will be available to see the document navigate from the Main Menu to Systems Admin – Spool.
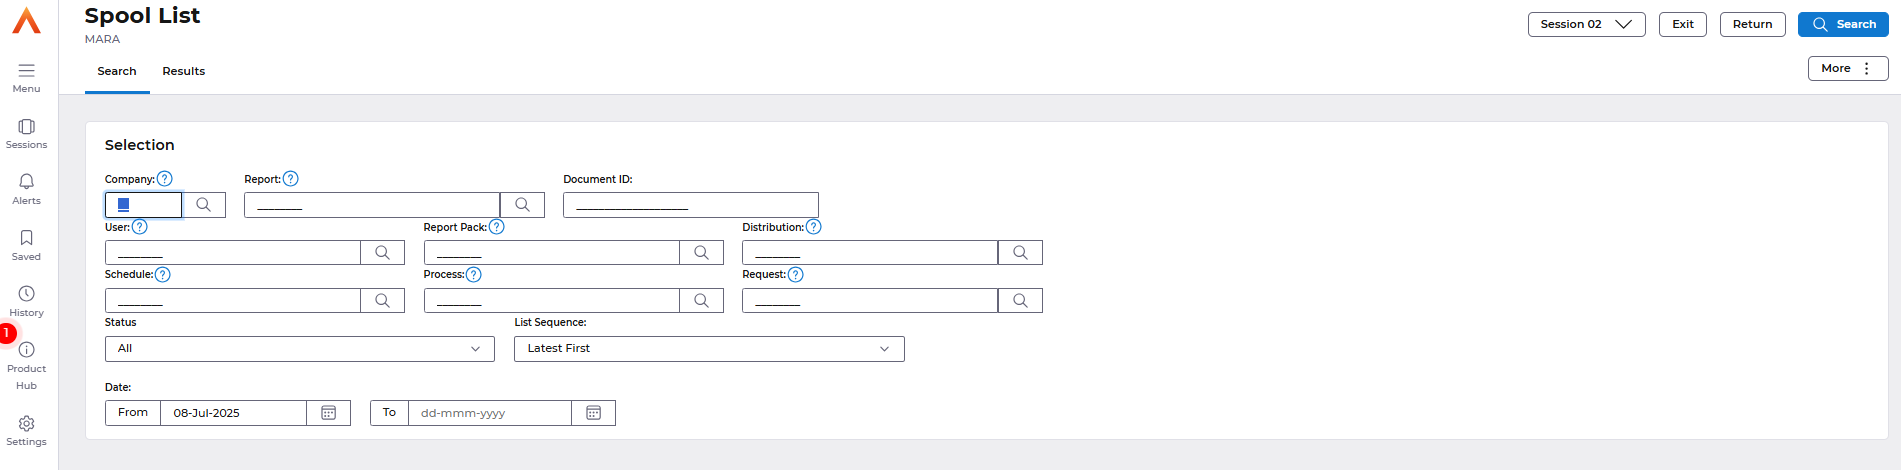
Enter your User in the User field and select Search to retrieve documents that you have produced.
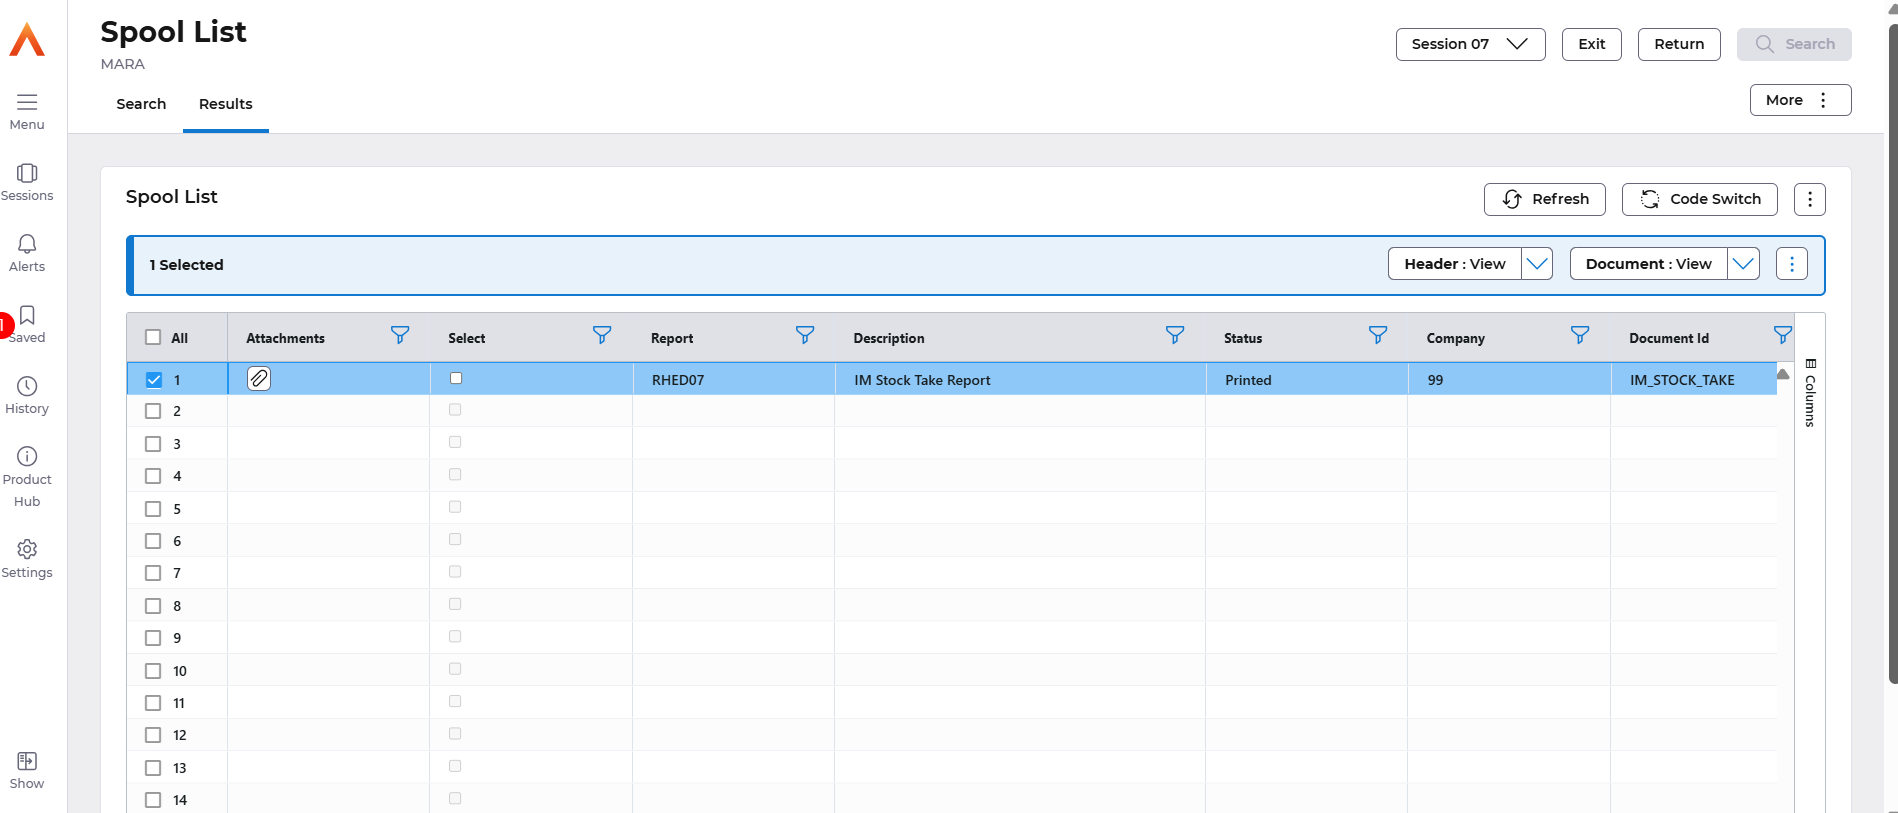
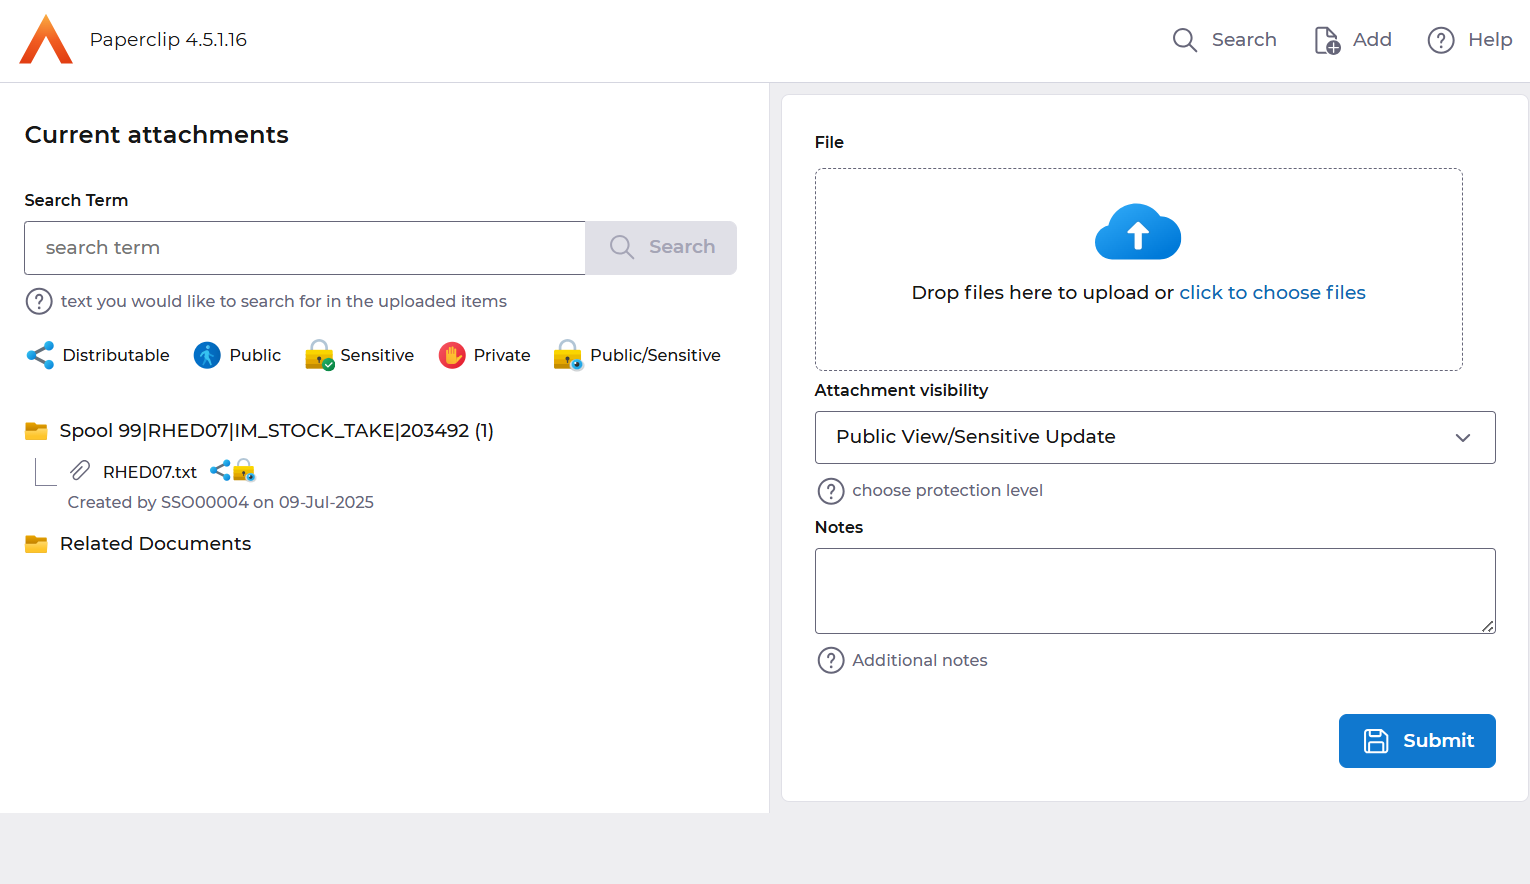
Double click on the Attachments icon to open Paperclip.
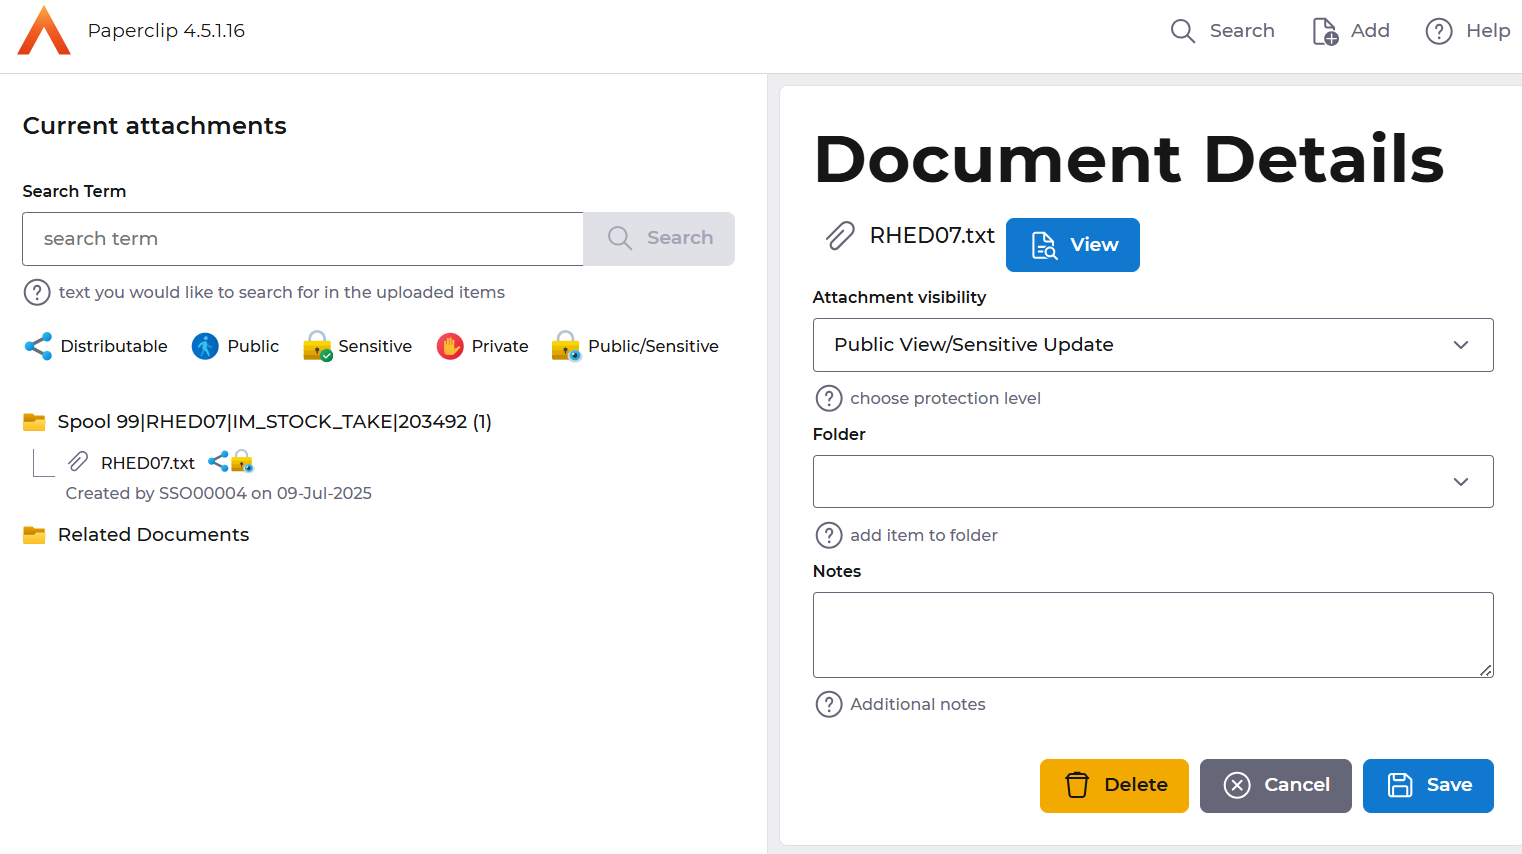
Select the document, followed by the View button.
The Stock Take document will be displayed.
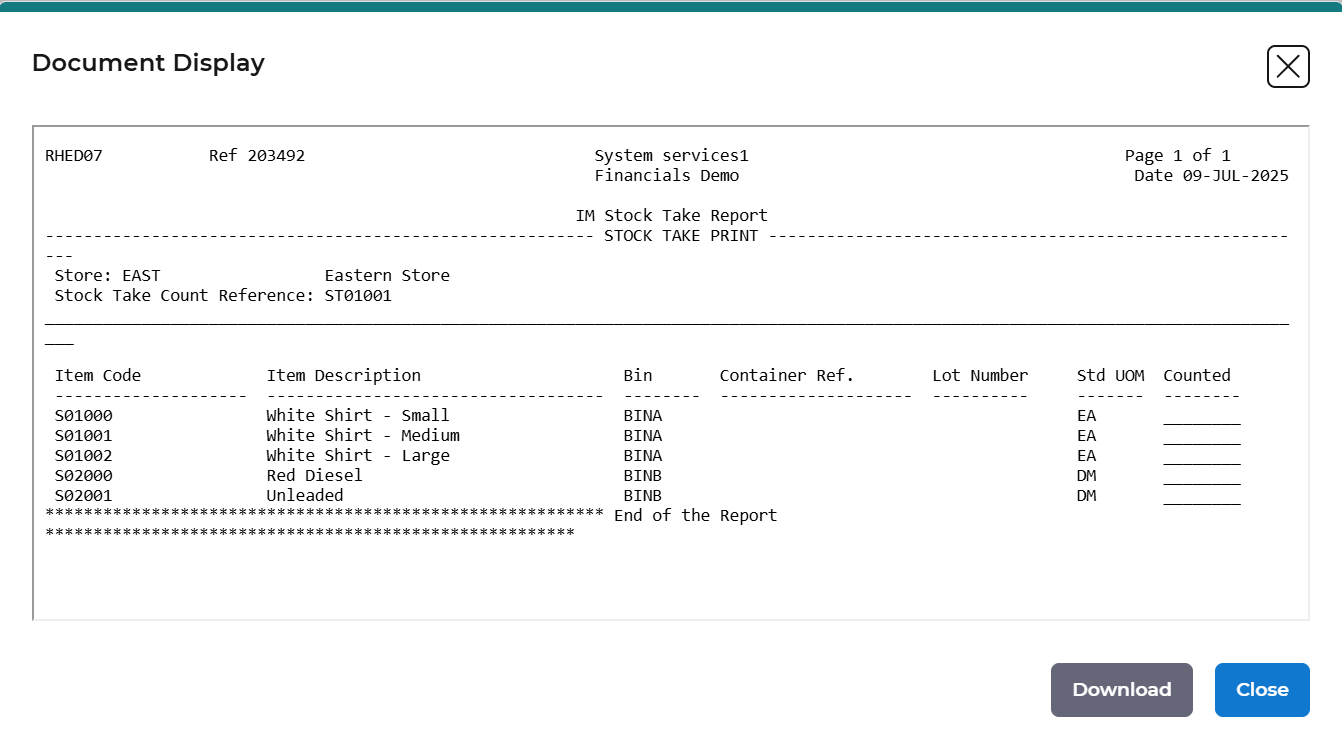
Select Download to download the document to your desktop.
You will now be able to save or print the document, and you will be ready to perform the Stock Take.

Enter Stock Count Confirmation
Once the stock take has been performed you can enter the count in Financials.
In Financials from the Main Menu go to – Inventory Management – IM Processes – Stock Taking and select the Enter Count Confirmation option.
If your Purchasing User has the Usual Store field populated you will automatically see all outstanding stock takes for that Store, otherwise you will need to specify the Store in the selection window and select the Search option.
Your Stock Take will be displayed, select the Edit – Count action.
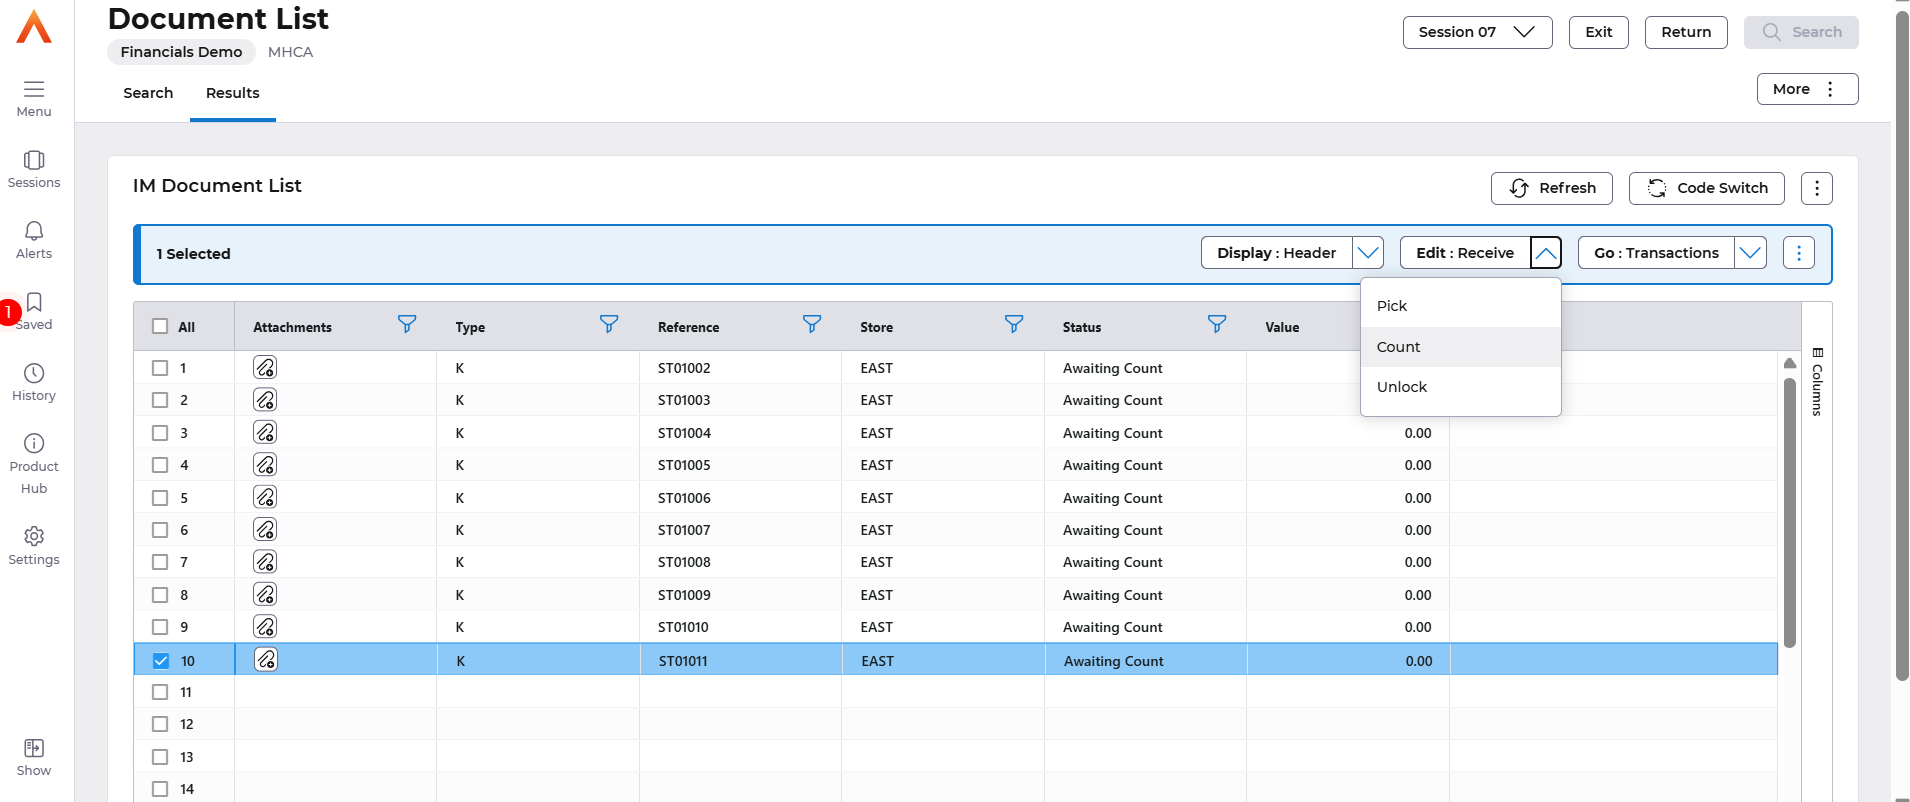
The Items included in the Stock Take will be displayed.
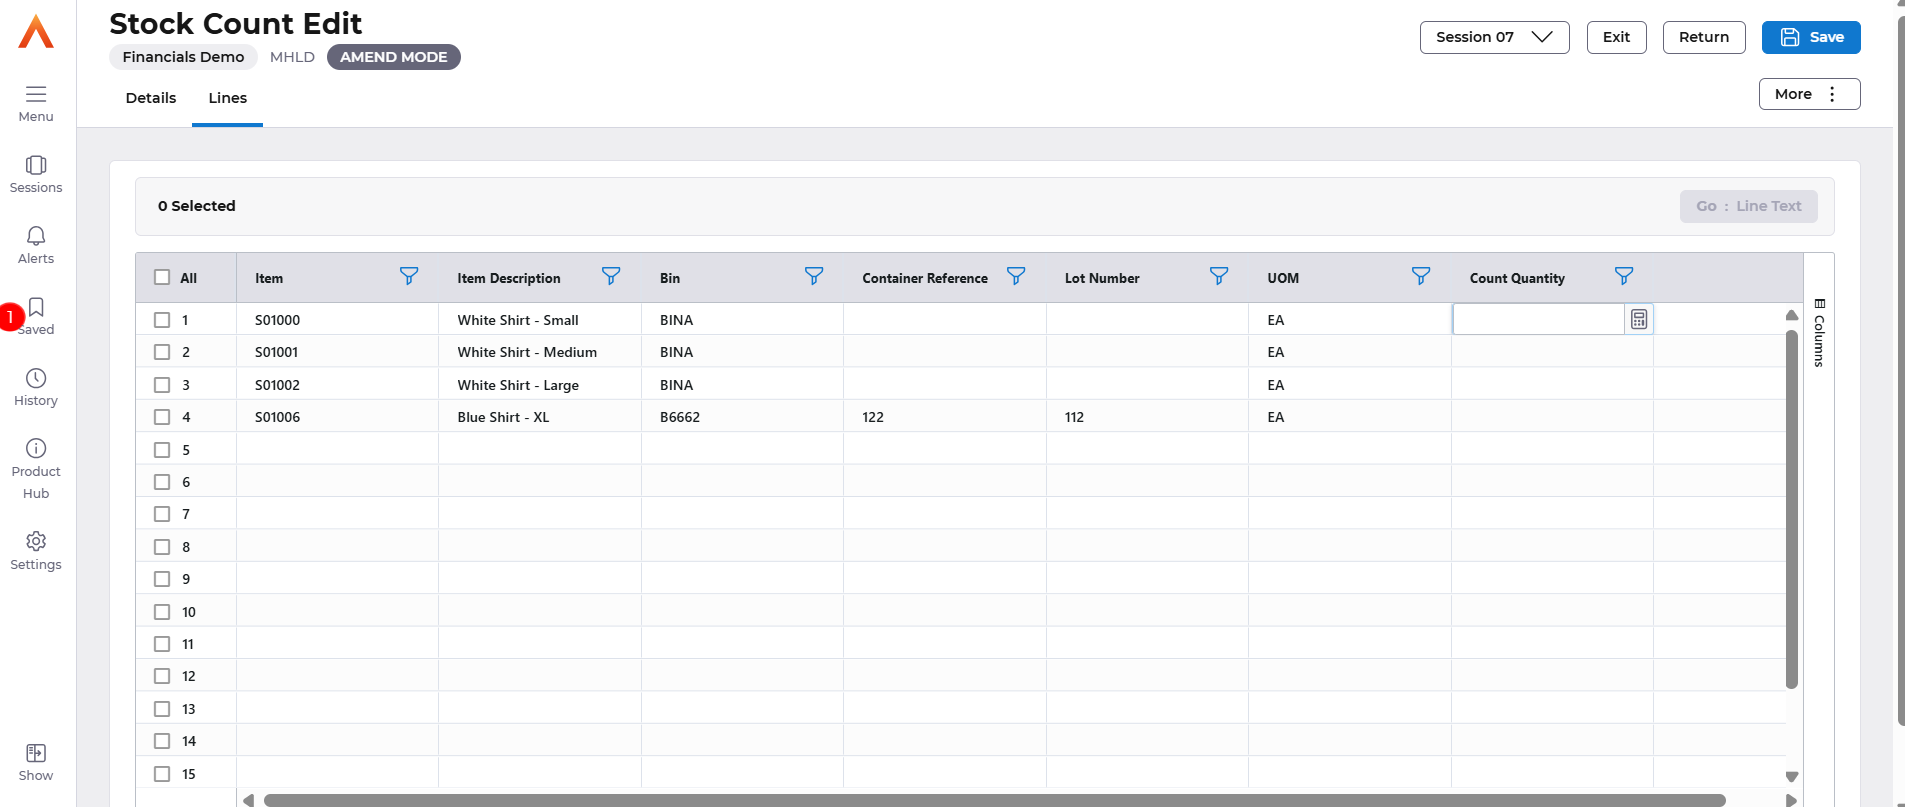
Enter the Count Quantity.
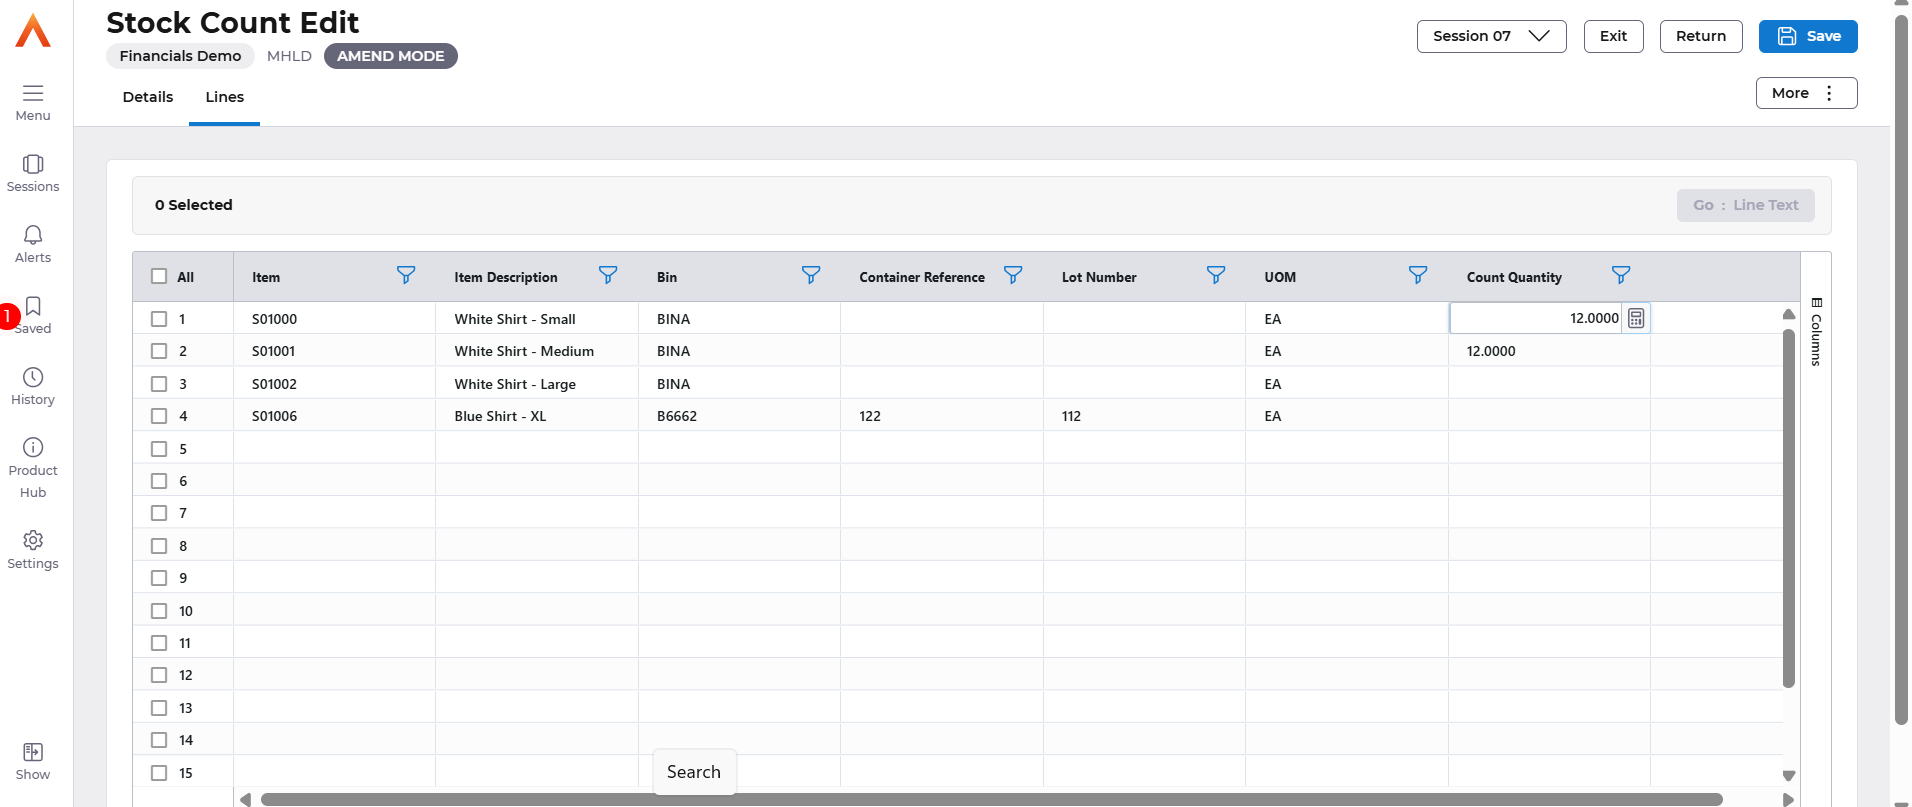
Once you have entered all the Quantities, or if you want to only count some of the items (leave the uncounted items blank), go to the Details Screen and tick the Count Complete flag.
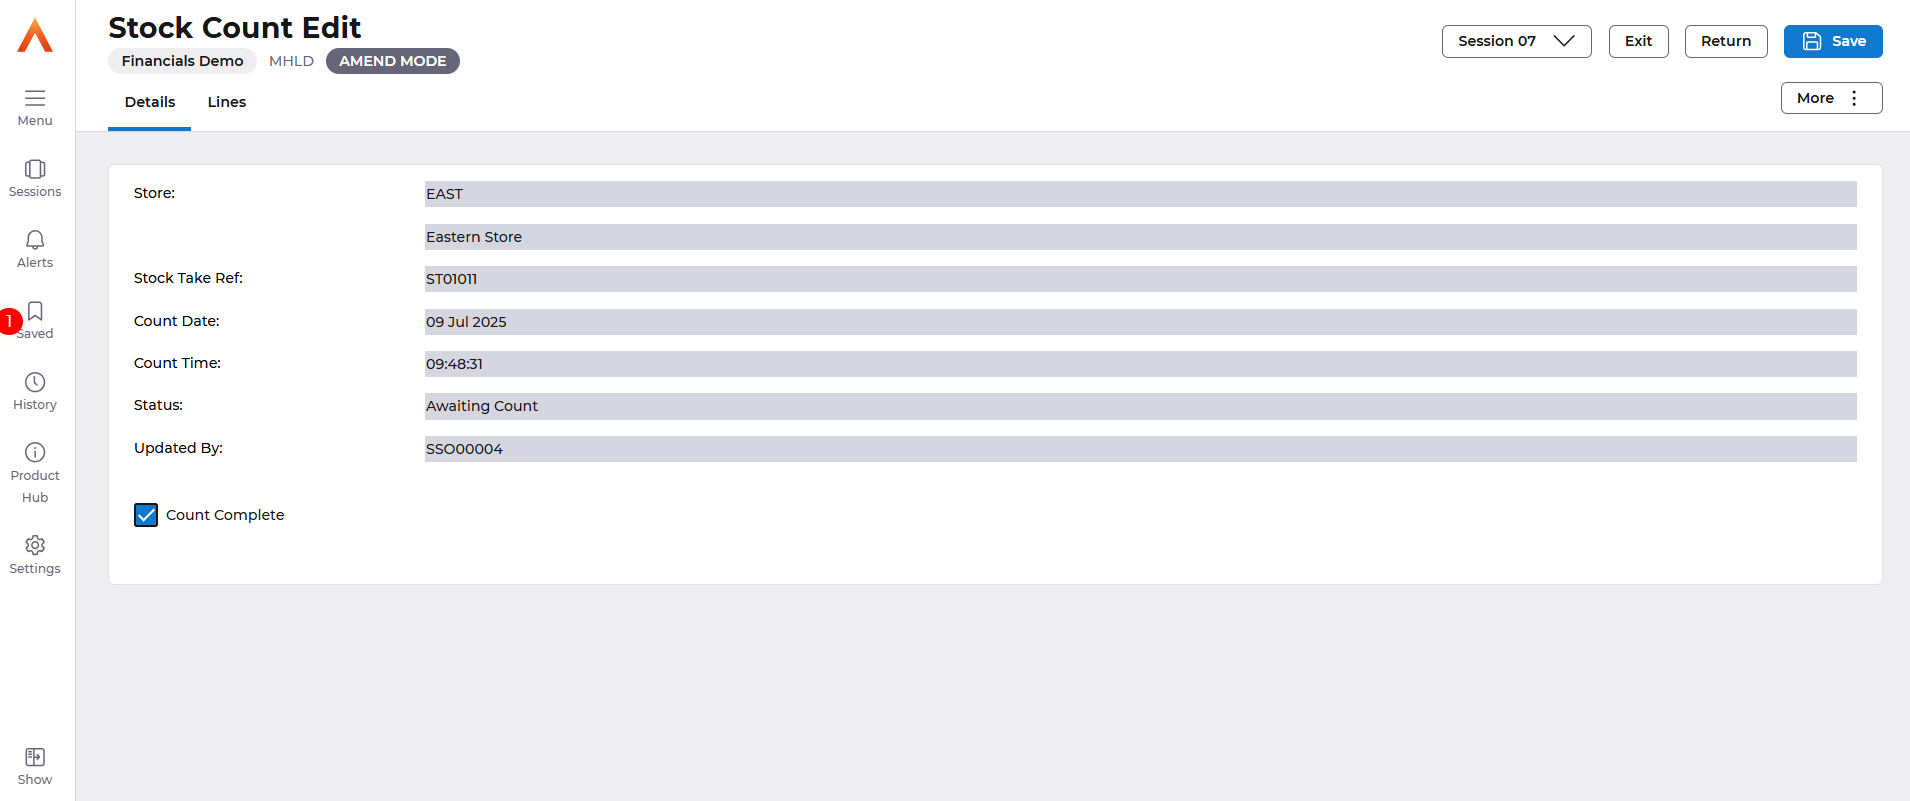
Then select Save, you will return to the Document List screen, and you will advise that the previously requested action has been performed.
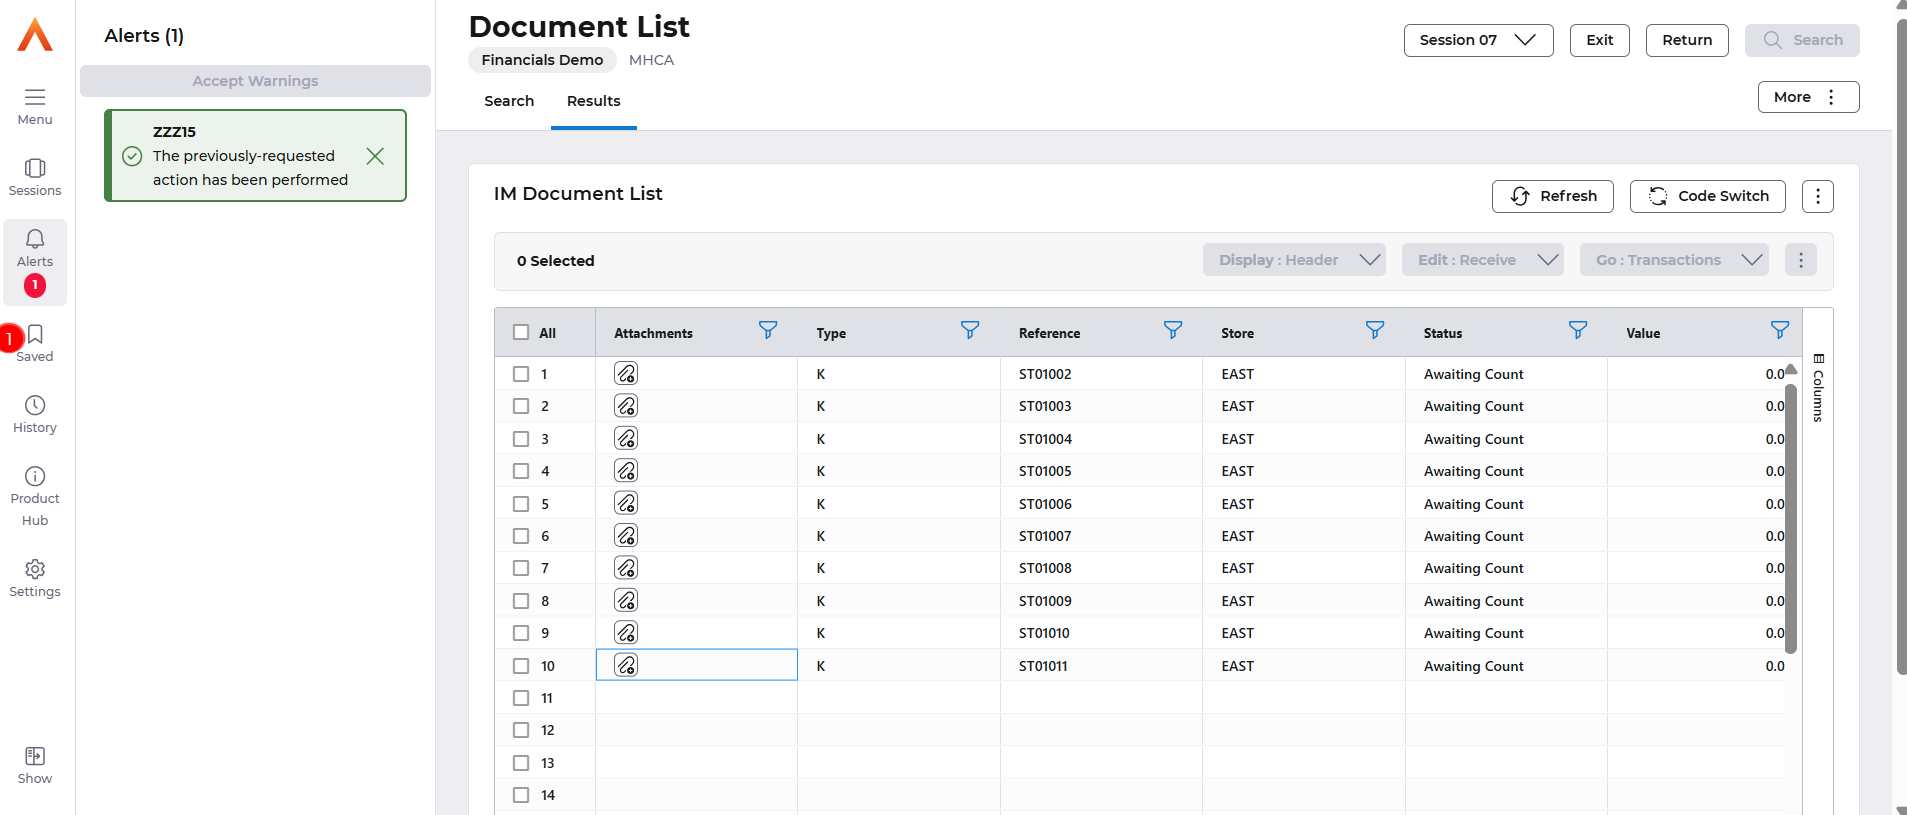
To see the impact of the Stock Count, you can navigate from the Main Menu to Inventory Management – IM Processes – IM Stock Taking and select the View Complete Stock Counts option.
If your Purchasing User has the Usual Store field populated you will automatically see all outstanding stock takes for that Store, otherwise you will need to specify the Store in the selection window and select the Search option.
Your Stock Take will be displayed, select the Display – Header action.
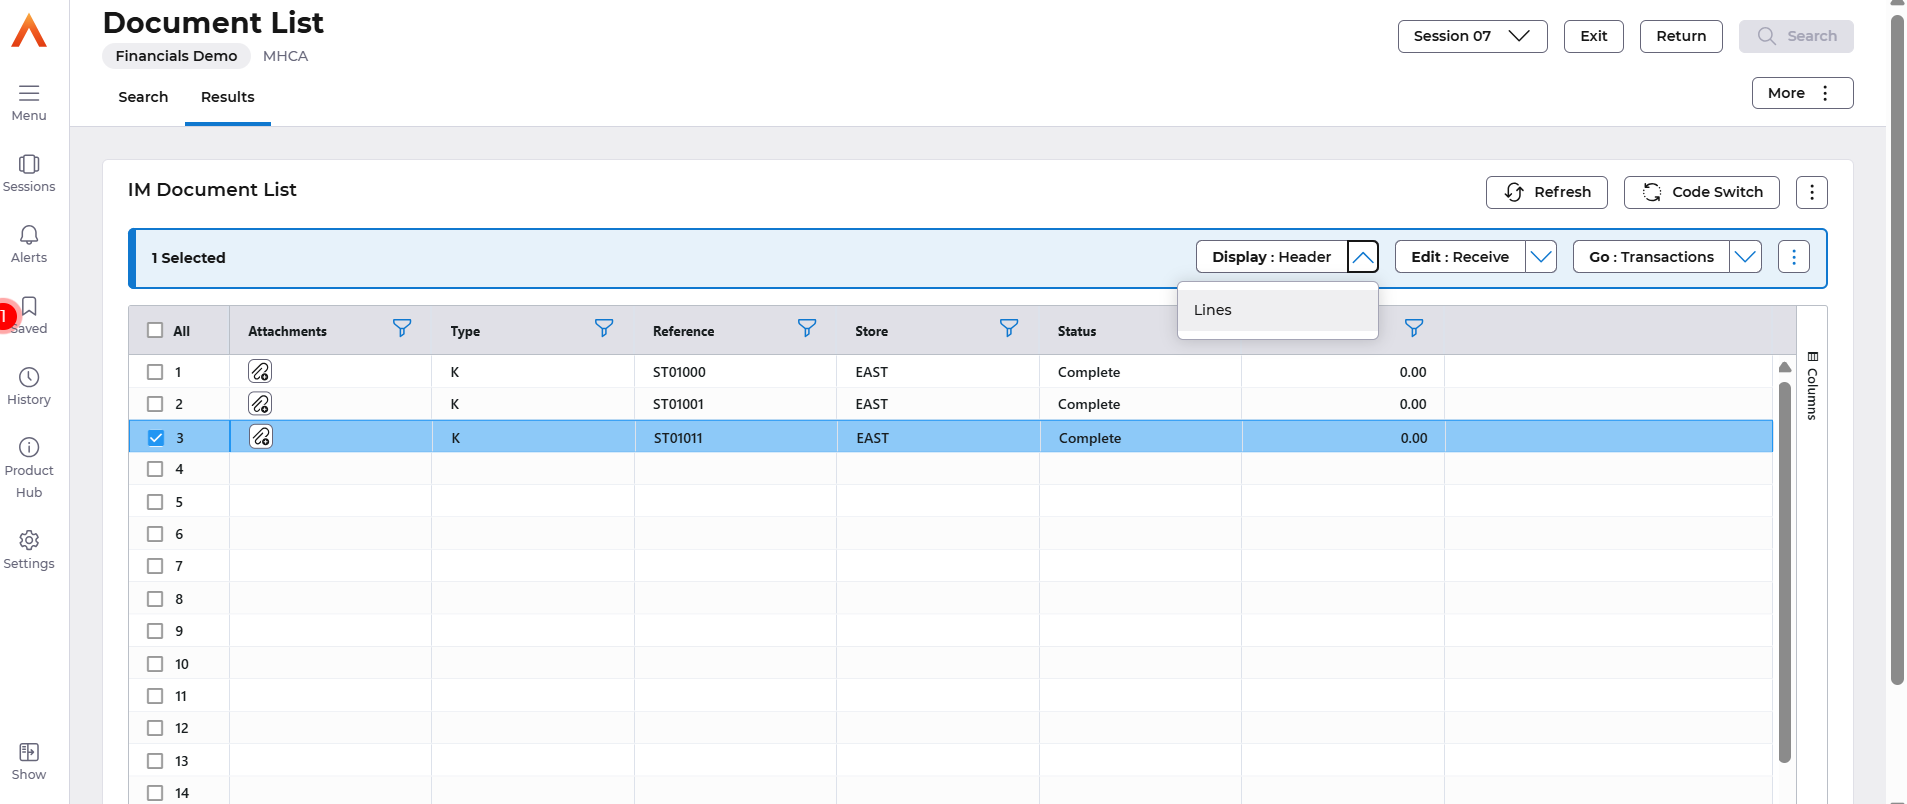
The Stock Take – View will show Lines to be Counted, Lines not Counted.
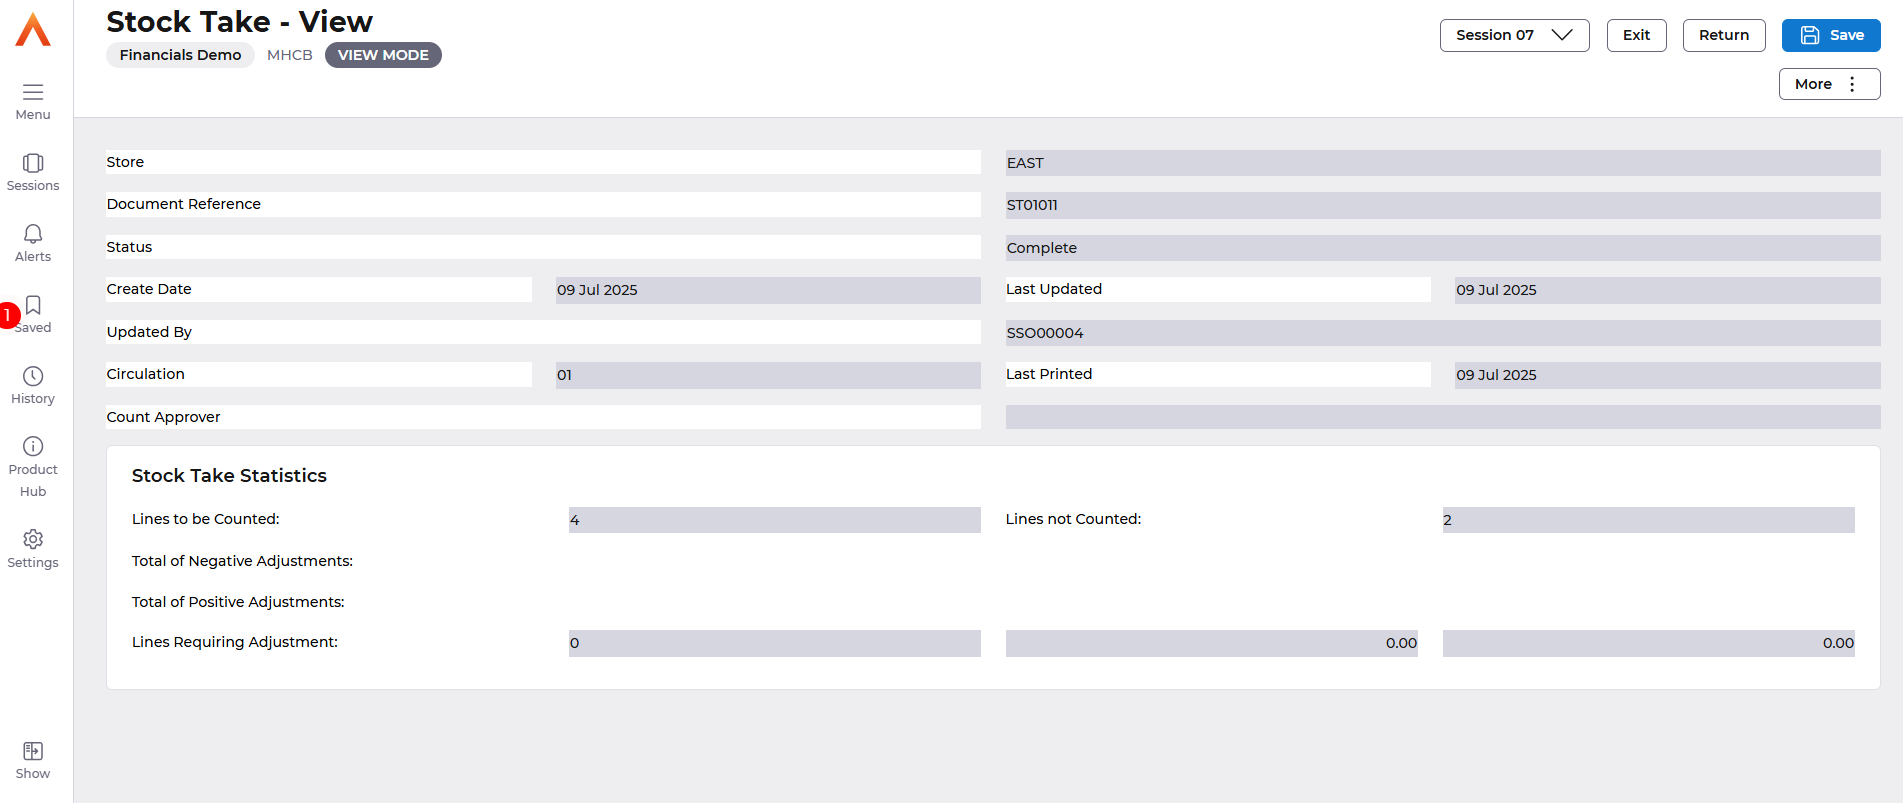
Select Display Lines and you can see the Count Quantity and any Variance Quantity.
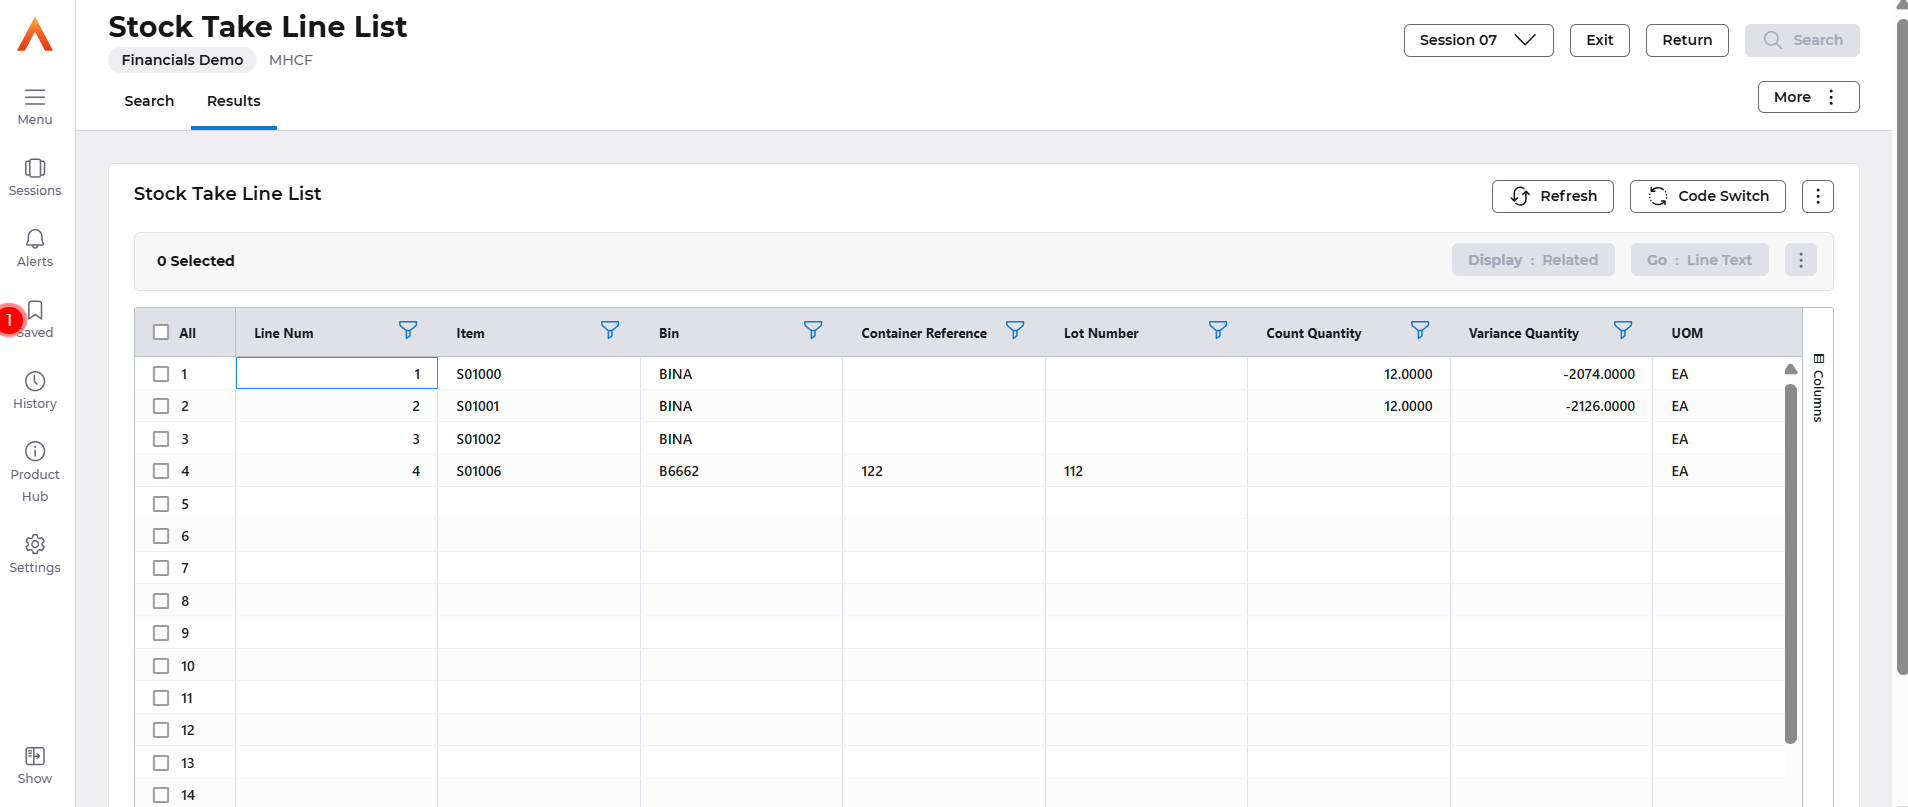
As well as the details of any adjustments that have been automatically generated to increase or decrease the physical quantity stock.
