Contents
Manual Bank Reconciliation
 Updated
by Caroline Buckland
Updated
by Caroline Buckland
Overview
The manual bank reconciliation facility can be used to reconcile any bank and Cash Book transactions that cannot be reconciled via the automatic bank reconciliation process EW1.
It can be used to reconcile transactions meeting any of the following criteria: -
- Incorrect Reconciliation Code
- Mismatch in Values
- Miscellaneous Item Received from Bank
As in the automatic reconciliation process, any of the following combinations can be reconciled: -
- One Cash Book transaction to one Bank Statement transaction,
- One Cash Book transaction to multiple Bank Statement transactions,
- Multiple Cash Book transactions to one Bank Statement transaction,
- Multiple Cash Book transactions to multiple Bank Statement transactions, and
- Multiple Cash Book transactions that balance to zero.
- Single Bank Statement transactions that require generation of a Cash Book transaction.
- Multiple Bank Statement transactions that balance to zero.
Unlike the automatic reconciliation process there is no requirement that reconciliation codes and amounts match. If items to be reconciled have a mismatch on value, a journal will be required to complete the reconciliation process. This journal may be an adjustment to the cashbook (GL Adjustment) or to the Bank Statement (Bank Adjustment) and will be automatically generated by the system once selected.
The following scenarios are possible;
The cashbook is incorrect (statement correct) and an adjustment is required in the GL. The transaction would be flagged to reconcile and the GL Adjustment option selected. A journal would be created with postings to be made to Actuals Balance Classes.
Miscellaneous items require cashbook transactions – As above the transaction would be flagged to reconcile and an adjustment made to Actuals balances in GL following selection of the GL Adjustment option.
There is a material error on the Bank Statement – the cashbook is correct. In this circumstance the Bank Statement would need to be corrected not the GL.
Each manually reconciled transaction is stored in a temporary table until the user exits the Manual Bank Reconciliation Screen (ME0C). Items in the temporary table can be easily unmatched (reset to unreconciled) as part of the manual Bank Reconciliation Process.
The manual reconciliation facility is restricted to a single user and the data will be locked for the duration of the session.
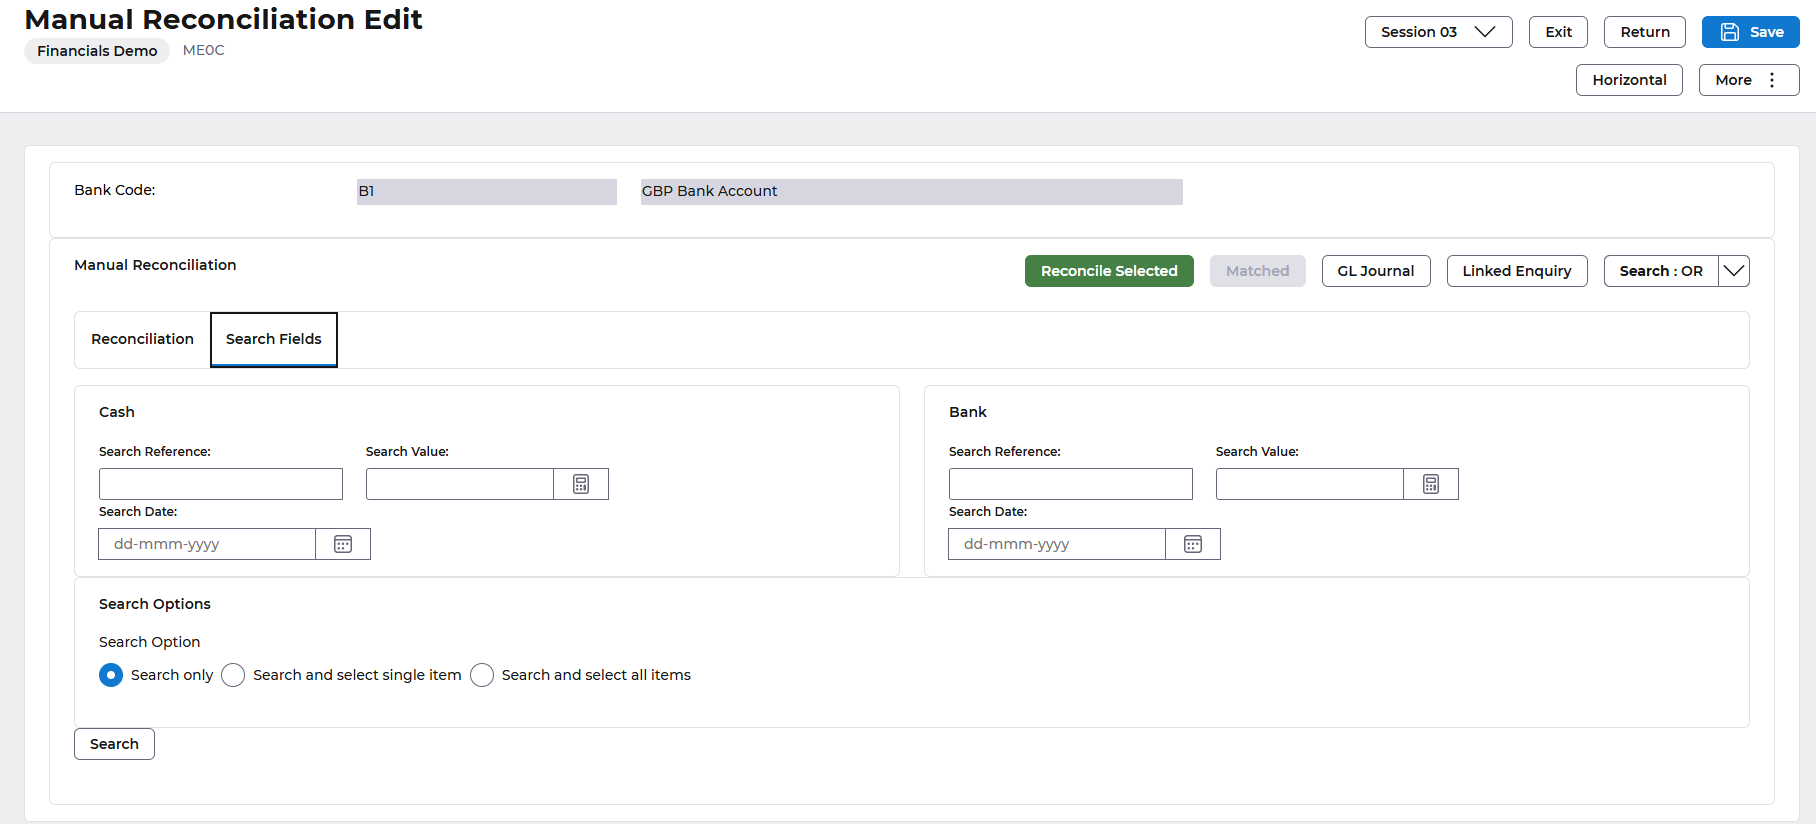
Navigate to: Bank Reconciliation>Bank Reconciliation Processes>Manual Reconciliation
Enter the Bank Code you wish to reconcile and then select Search.
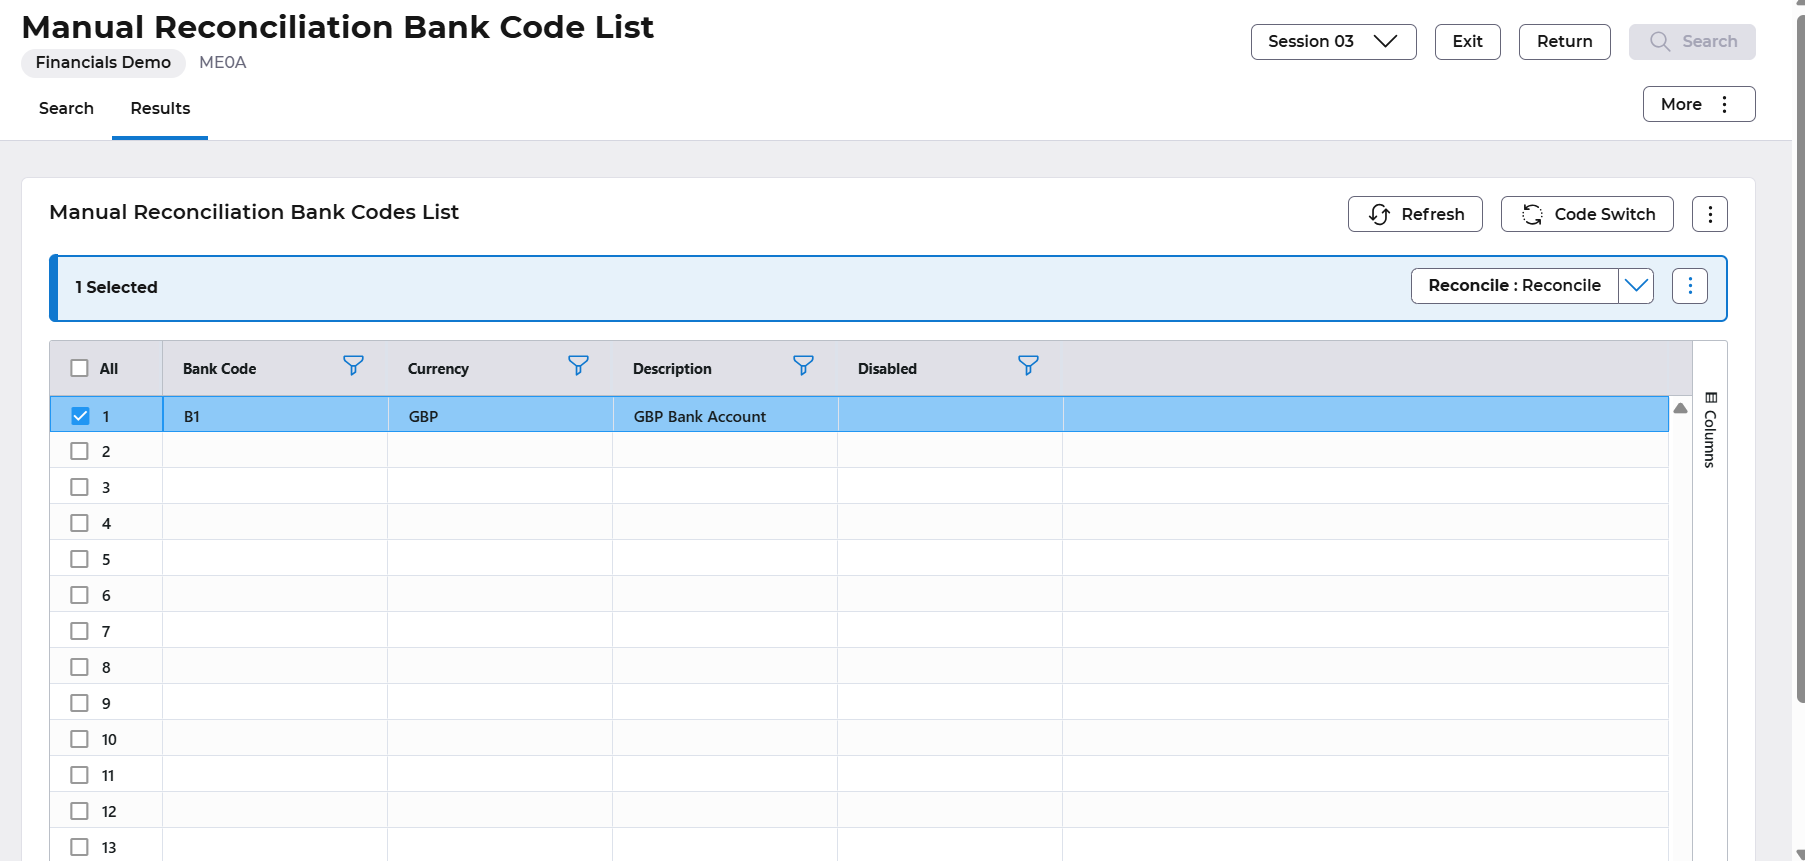
Then select the Reconcile:Reconcile button.
The reconciliation screen is split identifying the unreconciled Cash Book transactions at the left f and the unreconciled Bank Statement items in the right of the screen. Transactions will be in reconciliation code order and the user can move up and down each window independently using the scroll bars.
The system will retrieve the data to populate the above screen from the bank code selected according to the following parameters:
All unreconciled transactions in Balance Class AB and the bank adjustment Balance Class (as defined on the Bank Reconciliation Company Controls (ME01)).
All unreconciled transactions in the statement take-on Balance Class (as defined on the Bank Reconciliation Company Controls (ME01.
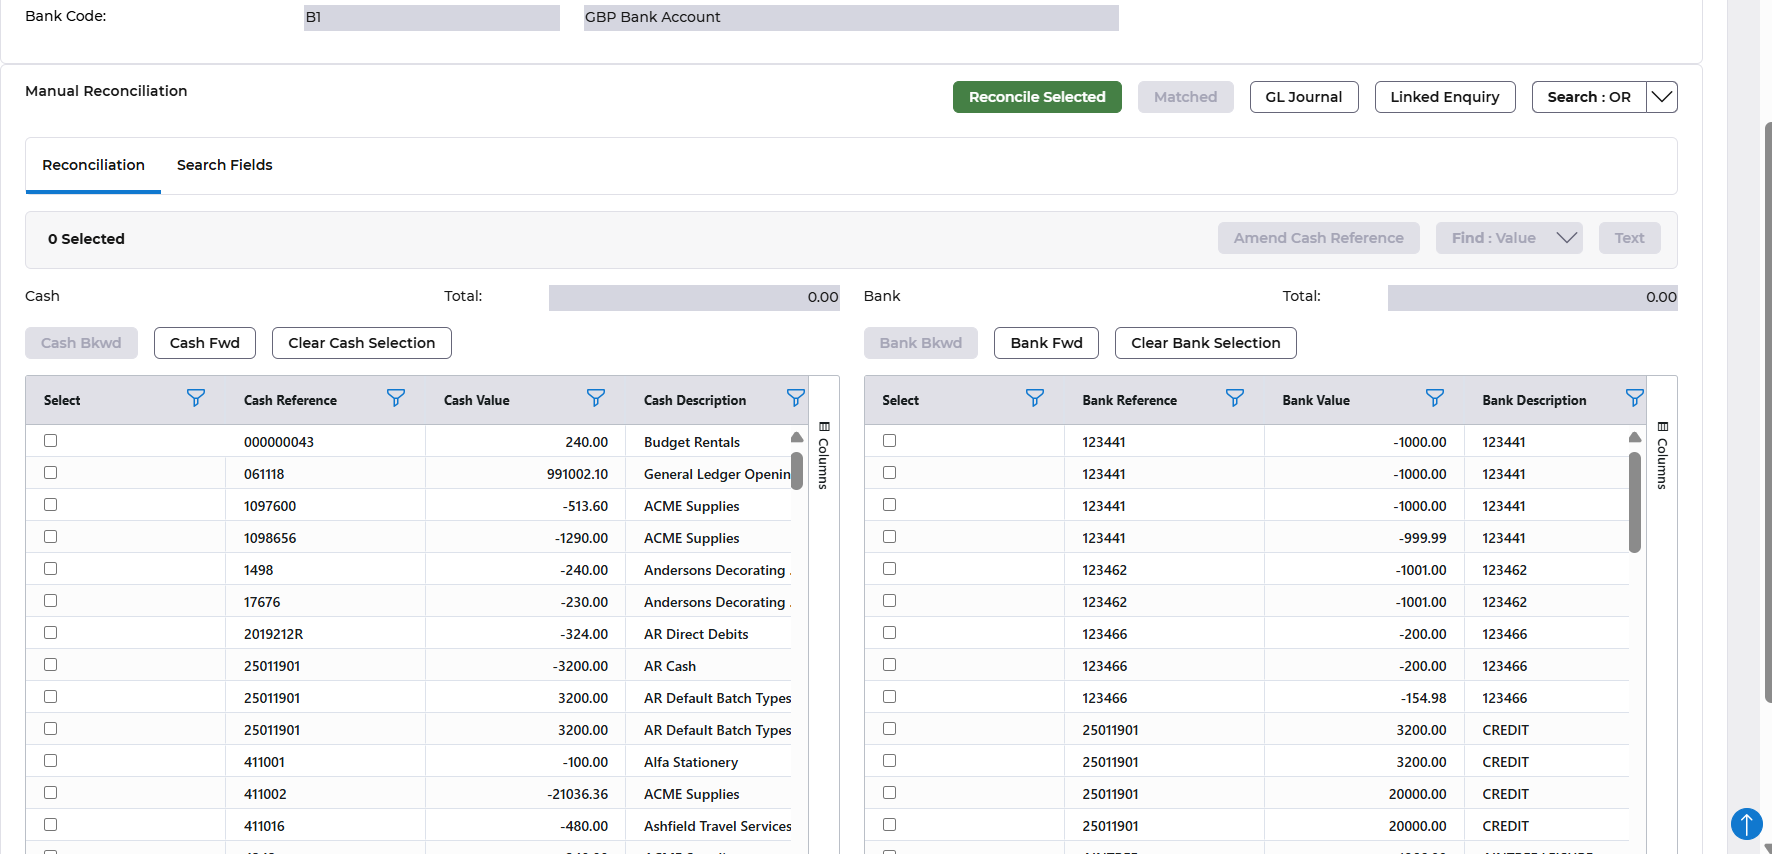
The columns defined on the manual reconciliation screen are as follows:
Cash Book
- Reconciliation Code
- Value
- Description
- Transaction Date
- Source System (AR, AP etc)
Bank
- Reconciliation Code
- Value
- Description
- Transaction Date
- Transaction Type
Manually Reconcile Transactions with Matching Values
Typically, this functionality would be required where: -
- Transactions have been entered with incorrect reconciliation codes, or
- Cashbook transactions balancing to zero need to be flagged as reconciled.
Journal entries will not be generated in this situation.
Where a reconciliation code is incorrect but the values match, select the Cashbook and bank items to be reconciled by clicking on the selection box next to each transaction.
Select the the ‘Reconcile Selected’

The Manual reconciliation screen will be refreshed and the reconciled items will be removed from the screen and placed in a temporary table. Additional transactions may be now reconciled.
Once all selected transactions have been reconciled, select ‘Save’ to complete the process.
Reconcile Transactions with a Mismatch in Values
In some situations there will be items that need to be matched that don’t have the same values. Depending on the ‘materiality’ of the variance between the two items to be matched, the difference will be either written off or saved awaiting a balancing entry from the bank.
Manual reconciliation is undertaken as described above.
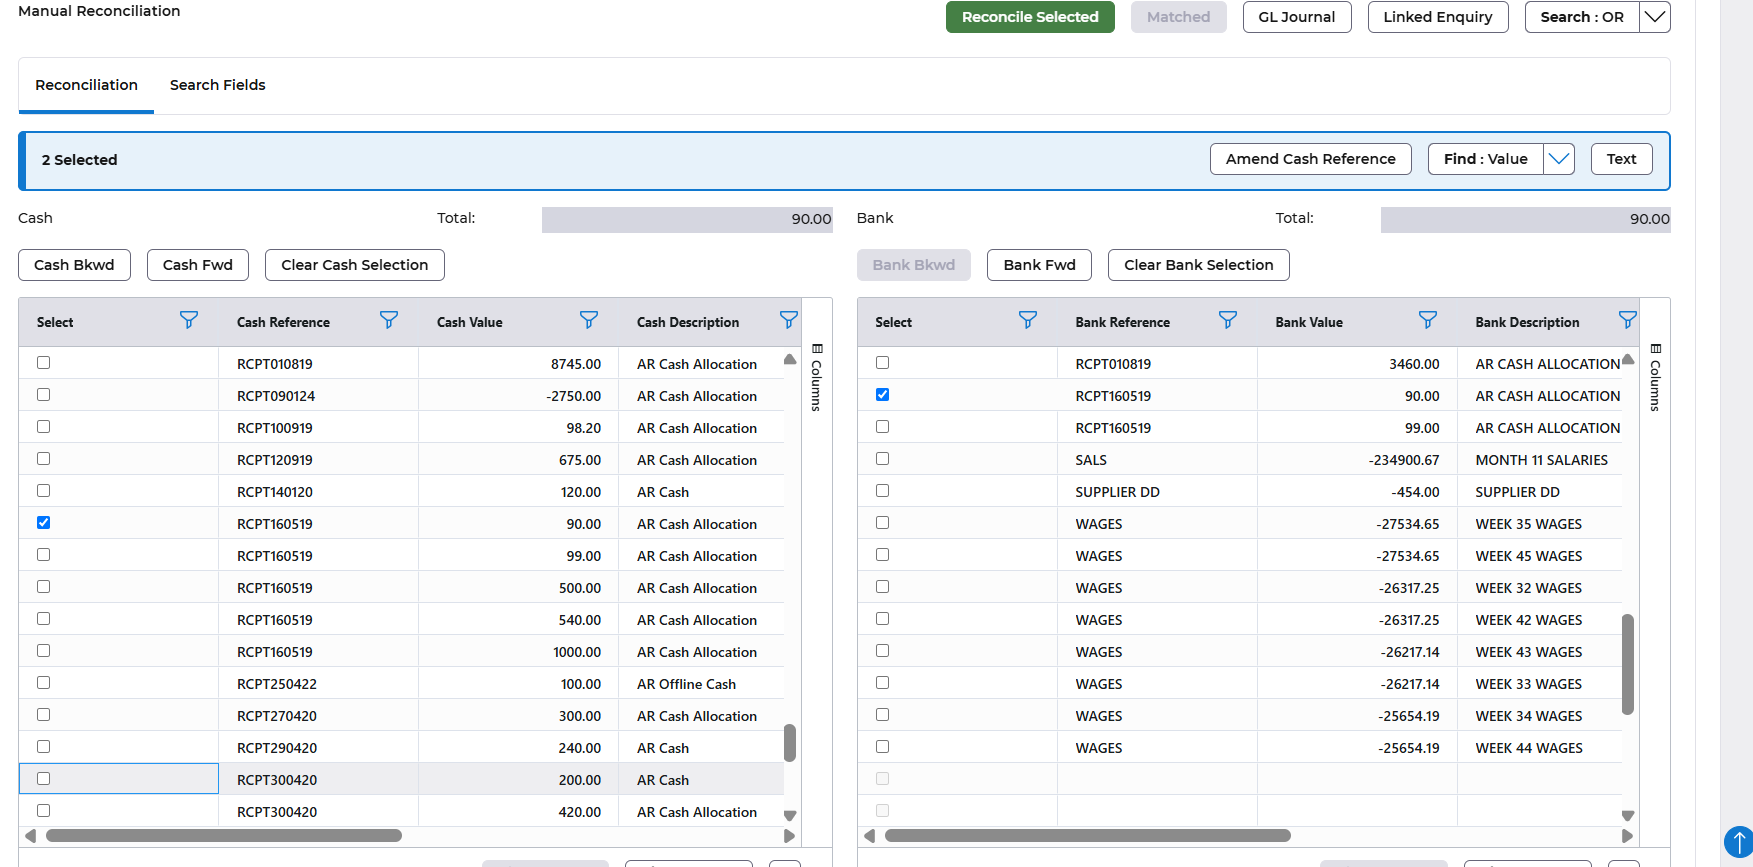
After selecting the items to be matched and selecting the 'Reconcile>‘Selected’ button the screen the Mismatch Window will be presented:
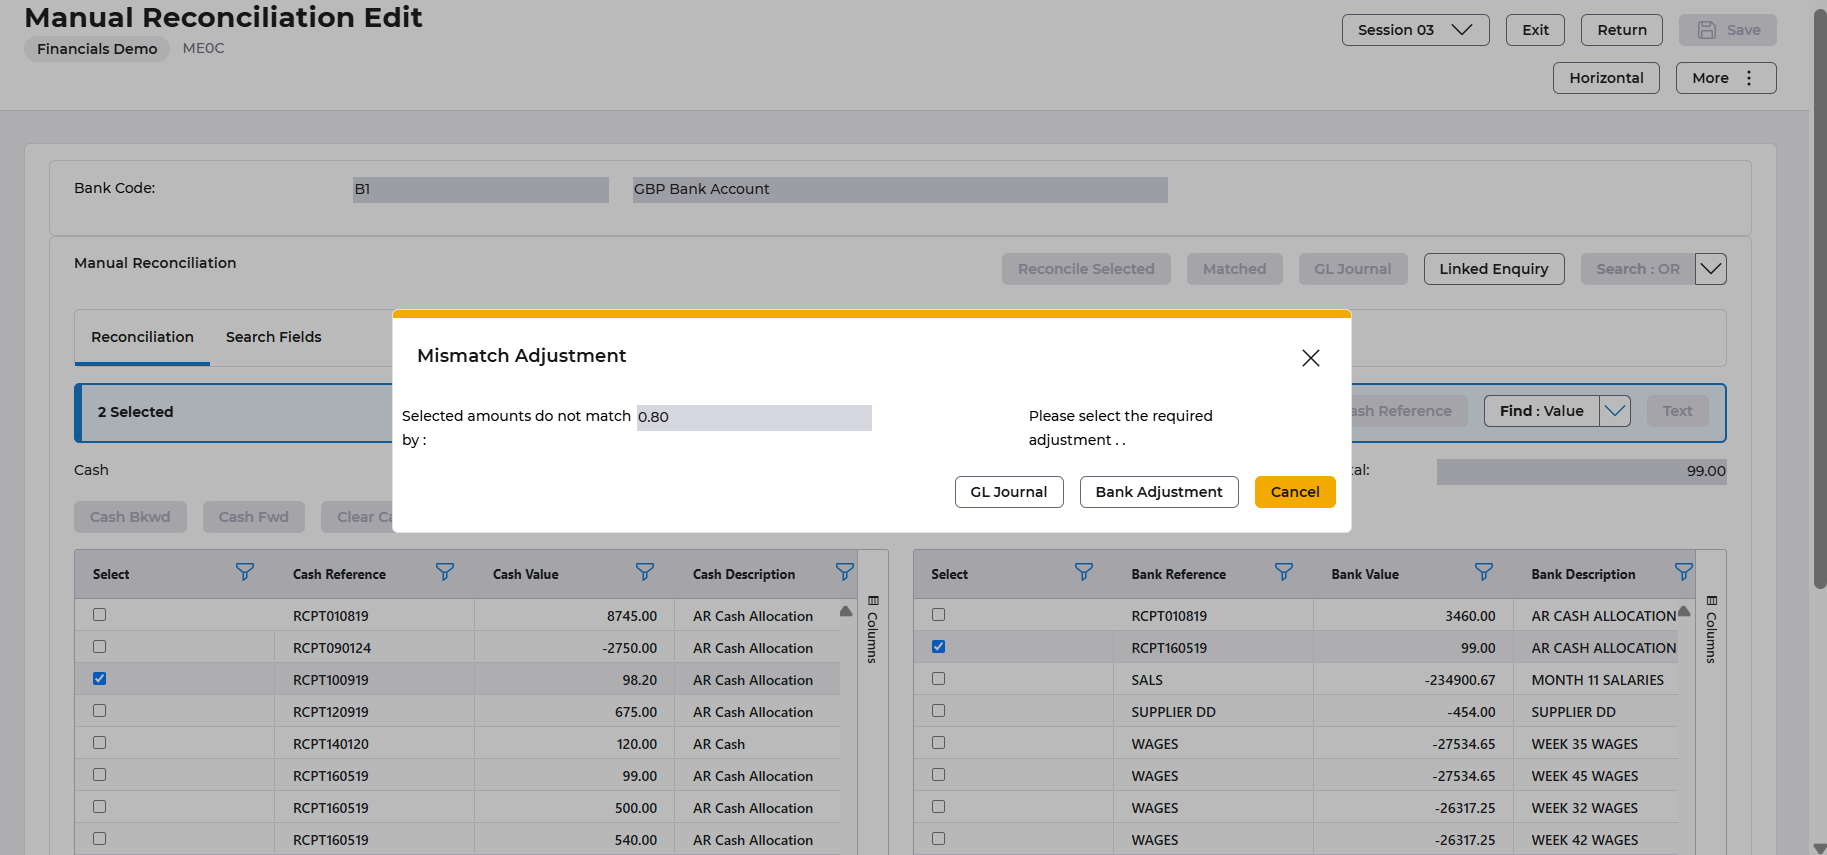
The user will be required to nominate the method necessary to deal with the value mismatch.
GL Adjustment : Choose this method if the difference is to be written off. After clicking on the ‘GL Adjustment’ button a journal screen will be displayed with the difference entered as a transaction against the bank account nominal (AB Balance Class). The user is required to enter the details of the other side (expense/write off account) of the journal into the area provided. As with all journals to the AB Balance Class, total credits must equal total debits for the journal to be accepted.
GL Period: If “Date” is entered, the period will default to the GL period in which the entered “date” falls. If “date” is not entered then a valid GL period must be entered.
GL Year Ind: Defaults to the current GL year. May need to be overwritten if “Date” is not in current year. Valid options are: -
- L Last Year
- This Year
- N Next Year
Date: The posting date for the GL transactions. Will default to today’s date but can be overwritten or left blank. If blank it will become the last day of the “period” entered next.
Element: Leave blank if ICA is not in use, otherwise defaults from the BTZ of the originating transaction.
Access the Lines tab.
Account: Enter the appropriate write off or expense account for the other side of the journal.
Value: Enter one or more amounts to balance journal.
Description: Will default from the batch type description (GL Adjustments batch type as defined on the Bank Reconciliation Company Controls). Can be overwritten.
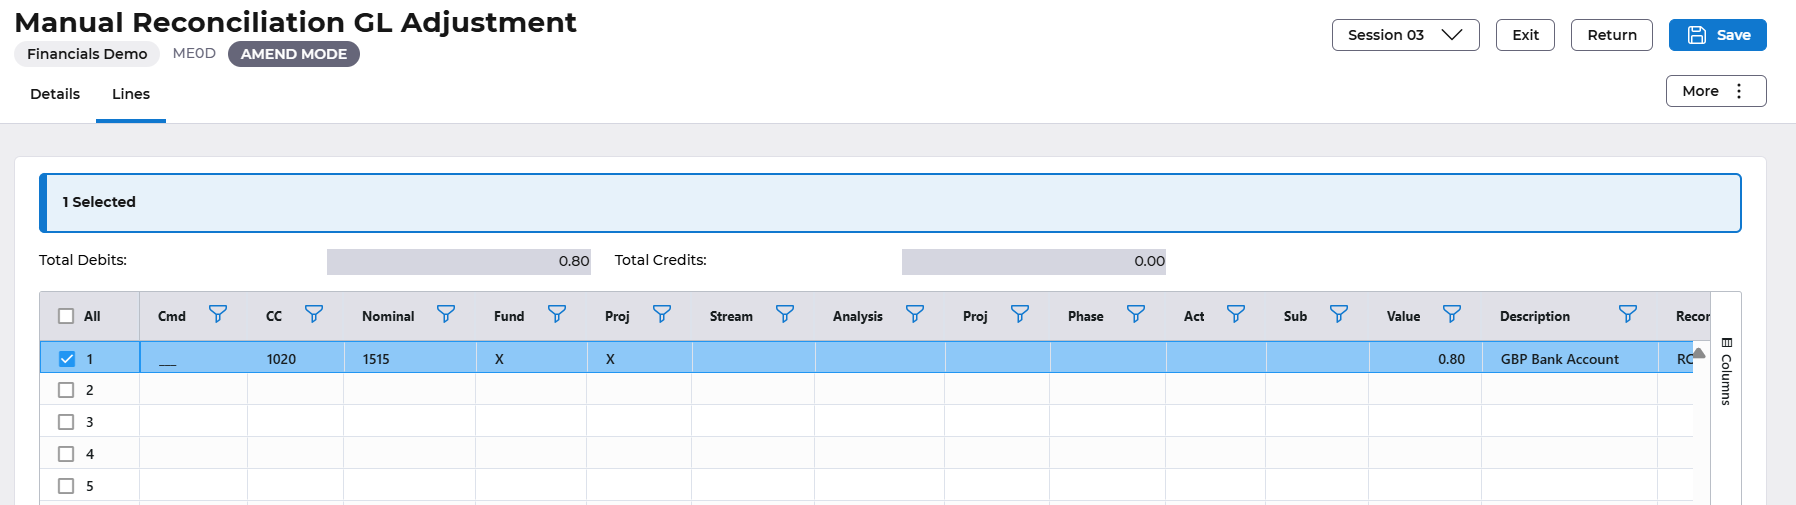
Select the Save button. The user will be returned to the Manual reconciliation screen (ME0C) and the reconciled items will be removed from the screen and placed in a temporary table. Additional transactions may be now reconciled.
Once all selected transactions have been reconciled, select 'Save’ to complete the process.
Bank Adjustment option:
Choose this method if the difference is material and the bank will provide a correction. Select the “Bank Adjustment” button. A journal will be created in the background for the difference and will be posted to the “Bank Adjustment” Balance Class as defined on the Bank Reconciliation Company Controls.
The user will be returned to the Manual reconciliation screen and the reconciled items will be removed from the screen and placed in a temporary table. Additional transactions may be now reconciled.
Once all selected transactions have been reconciled, select 'Save' to complete the process.
Miscellaneous Items Received from the Bank
A number of items often appear on the Bank Statement before they appear in the GL. These transactions typically relate to bank charges and fees. To automatically create a journal in the Actuals Balance Class to reflect this transaction, select the bank transaction you wish to journal and select the “ GL Journal” button at the right of the screen.

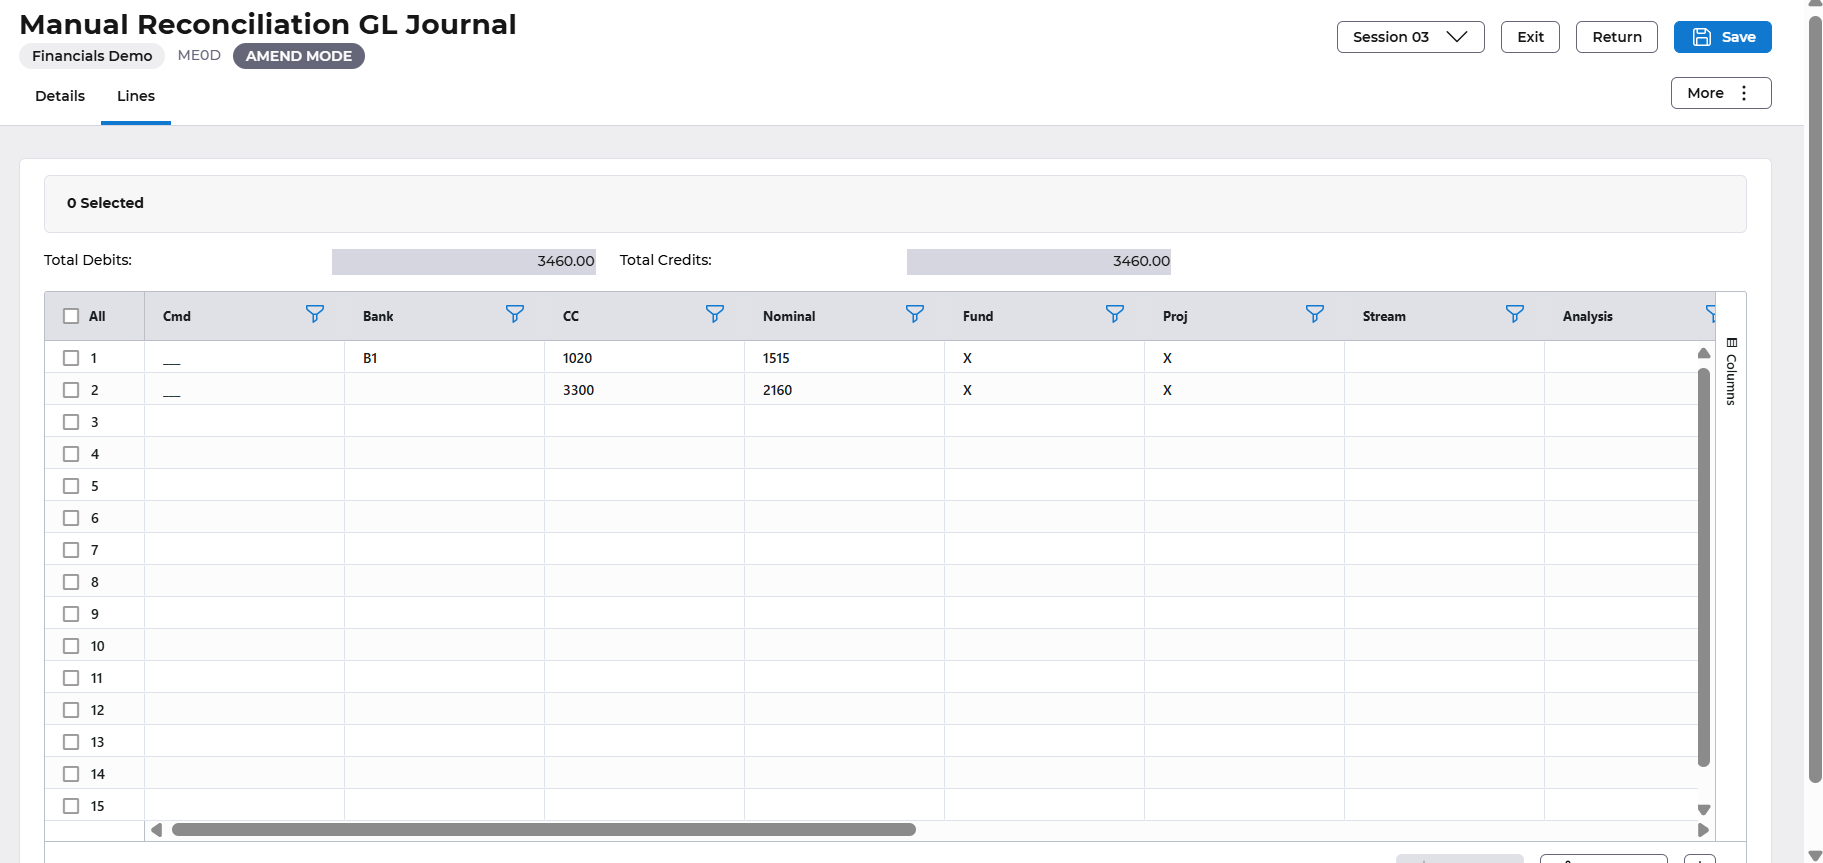
The journal will automatically populate the following fields:
Date: Today’s Date
Period: GL Period relating to today’s date
Year: This Year
Description: Bank Reconciliation Adjustment
Element: Leave blank if ICA is not in use, otherwise enter the BTZ of the originating transaction.
1st Line of Details: Populated with the value and reconciliation code of the bank transaction. These details cannot be altered and will be posted to the AB Balance Class bank account in the GL as defined on the Bank Code Table.
2nd Line of Details: The reconciliation code and opposite value are automatically populated. The remaining details are extracted from the transaction type details associated with the bank transaction. All details on this line are amendable.
Click the ‘Save’ button. The user will be returned to the Manual reconciliation screen and the reconciled items will be removed from the screen and placed in a temporary table. Additional transactions may be now reconciled.
Once all selected transactions have been reconciled, select ‘Save’ to complete the process.
Reviewing and Unmatching Items in the Temporary Table.
All items matched using the manual reconciliation facility are held on a temporary table until the user exits from the Manual Reconciliation Screen . At this time, the temporary table is cleared down and, if the exiting has occurred as a result of pressing “Save”, the items will be flagged as reconciled and any related journals will be posted to the General Ledger.
During the manual reconciliation process there may be times when the user matches incorrect items.
Previously matched items can be reviewed as follows:
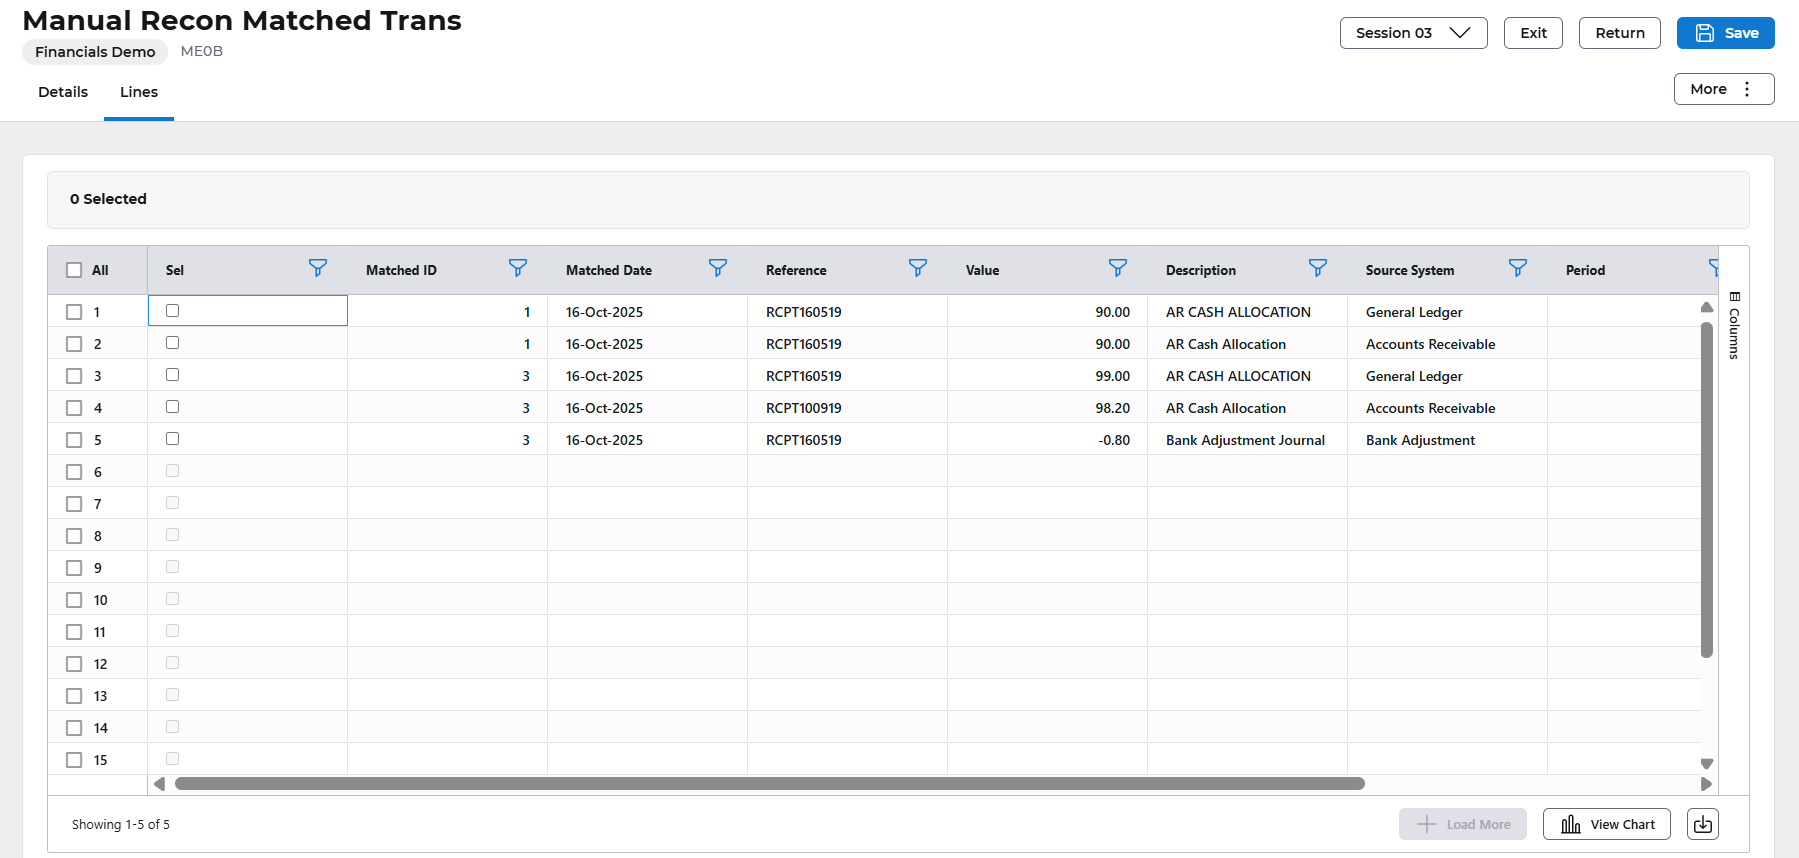
Click on the ‘Matched ’ button and a screen will be presented, showing all items that were matched in the current manual reconciliation session.

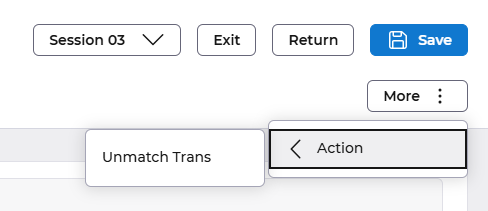
If some items have been matched incorrectly, select one of the items to be unmatched (click on the select box) and click the More>Action>Unmatch Trans button.
This will remove all transactions with the same temporary match id from the list and place them back on the Manual Reconciliation Edit screen).
If any items remain on the list the “Save” button will complete the reconciliation process and the user will be taken back to the Manual Reconciliation Bank Code List.
Alternatively, the “Return” button will return the user to the Manual Reconciliation Edit screen and the unmatched items will be replaced on the screen. Additional transactions may be now reconciled.
Once all selected transactions have been reconciled, select the ‘Save’ to complete the process.
Field Search and Linked Enquiry
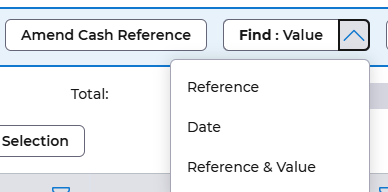
There are three ‘find’ options available in order to assist the user to find transactions during manual reconciliation.
If the user selects a transaction by clicking the selection box against the transaction a search can then be made to find the reconciling transaction. The search can be made for value, date or reference number.
For example
A transaction is listed as being in the Cash Book as unreconciled with the attributes;
Recon Code ALP010321
Value 3091.07
Date 28th Feb 20215
It could be unreconciled for a number of reasons, but if the user knows that the reconciliation code should include the date it could be that the transaction is unreconciled because of an incorrect reference number.
If the user clicks the select box against the transaction and selects the ‘Find Value’ key on the right side of the map, all the transactions in the Bank Statement listing with a value of 3091.07 would be listed, allowing the correct transaction to be selected for reconciliation.

If the user wants to trace a transaction back to the originating source module, the transaction would be highlighted and the ‘Linked Enquiry’ button selected. The user would then be able to enquire upon the transaction within the source module.

To assist the user to find transactions search fields exist on another tab to allow searches by reference, value and date against either the cashbook or bank statement transaction listings. For example, to select all cashbook transactions with a reference starting CANC, the user would enter CANC in the search reference field, click search and select all and click on the Search Or button.
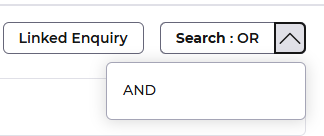
All relevant transactions will now be selected: